In this article, I will explain how to use Snapseed to remove objects in your photo. You can use this method to remove small objects like rubbish and large objects that should not be in the photo.
If you are new to Snapseed, it is a free app to edit your photos with your mobile, which has far more features available in most of the native photo editors of the mobile phone.
I will show you how to:
- Remove an object which is small with the Healing tool in Snapseed.
- Remove the larger object with the Double Exposure tool in Snapseed.
You can do this in just a few steps on your mobile. First, open the photo in the snapseed app.
Let’s get started.
1. How to remove an object with the Healing tool
I have an image taken at the roadside store. It looks good, but there's a piece of paper at the bottom right corner. You can easily remove it with the Healing tool of Snapseed.
Open up in snapseed, and choose the Healing tool.
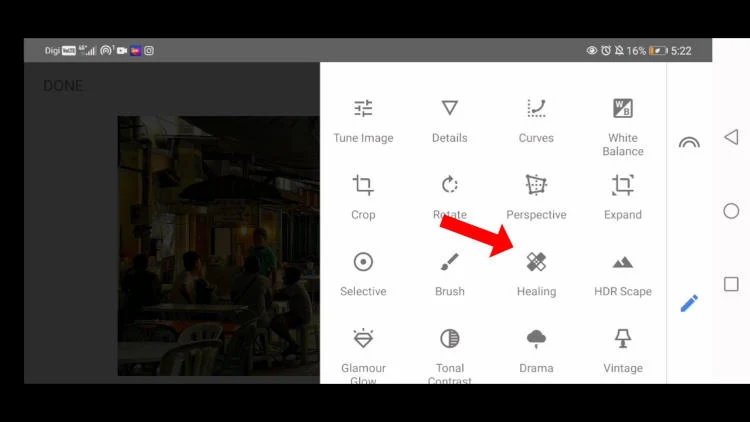
When you zoom in, you will see a piece of paper in the right corner in front.

If you want to remove it, draw on the screen to cover the piece of paper.
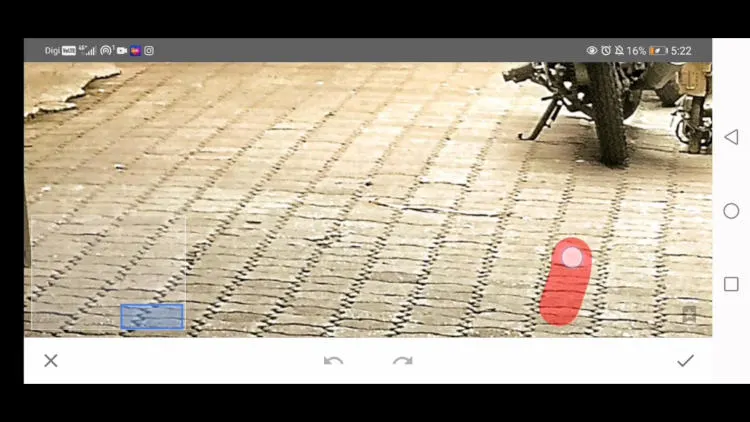
Remove your hand, and the paper will magically disappear!

Zoom out and click the tick button.
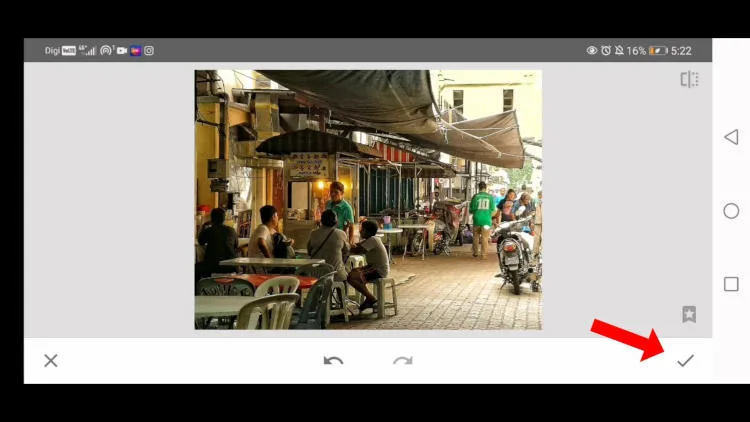
Click done.

You have removed the object that you don't want to appear in your image.
2. Remove objects with the Healing tool (large objects)
Now let's remove an object which is bigger with the Healing tool and see whether it also works well.
Let’s zoom in and draw on the object just like before.

It does work, but the finishing is quite ugly.
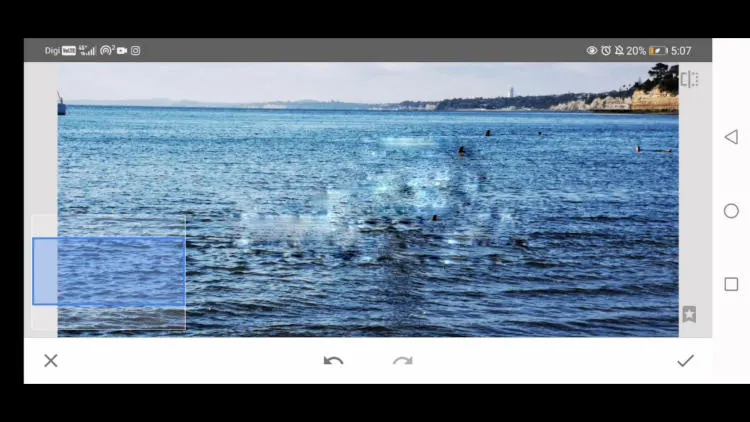
Therefore the Healing tool is best to remove small objects but not the best way to remove the large ones. The result is better if you use another tool called the Double Exposure tool.
Let's do it all over again.
3. How to remove a large object with the Double Exposure tool
This method removes the object by replacing it with a suitable part from an image you select.
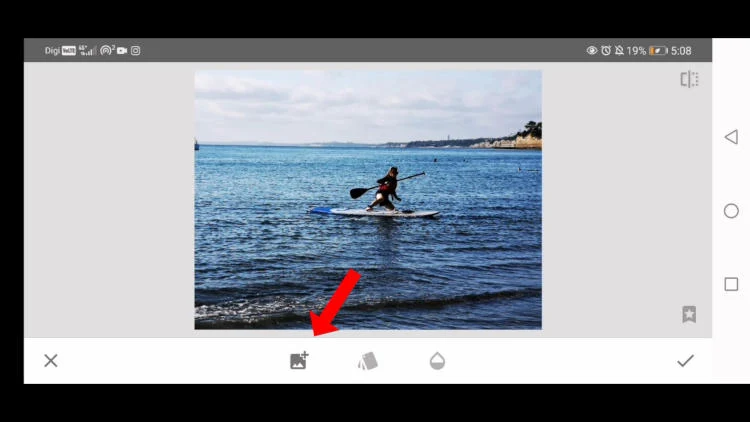
First, open up the selection box and choose Double Exposure.

Click the add image icon.
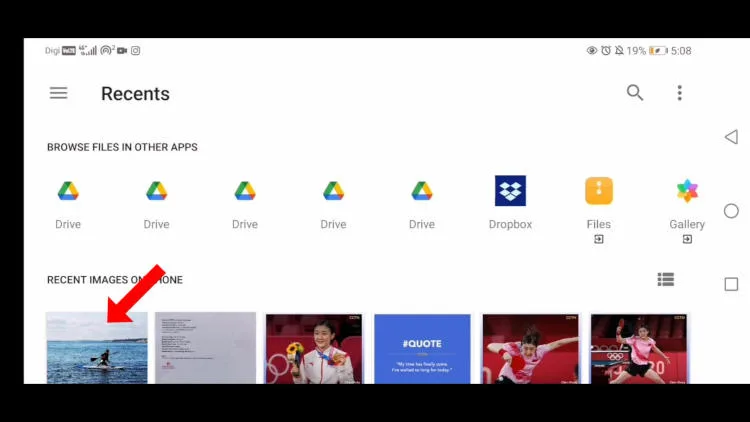
Look for an image on your computer and click it. In this case, I pick the same image as the original one because there is a part of the sea in this image that you can use to cover the object (the boat) perfectly.
Once you click and upload the second image, Snapseed will put the image you choose on top of the original image.
The image looks like nothing has happened because both images are stacked up together. Furthermore, you will not notice it because they are identical images.
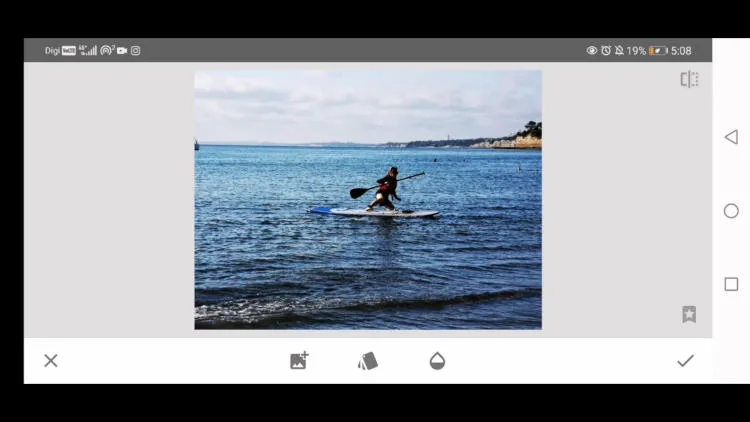
If you glide your finger on the screen, you will move the second image. The original image is not moving.
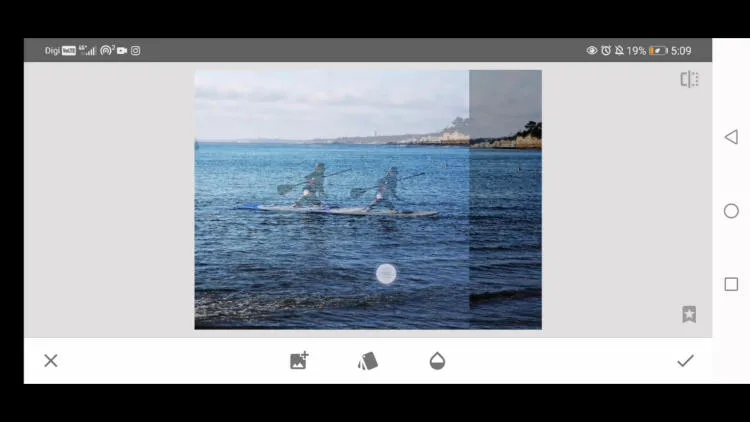
Now I move the second image slightly with my finger. The sea of the second image is covered right on the object I want to remove in the first image.
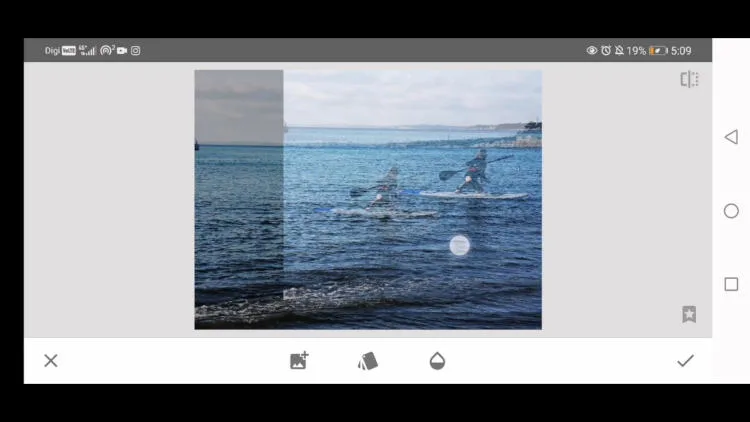
Now tap the transparency icon, which is the icon on the right.

If you glide to the left, the second image is fully transparent and disappears.
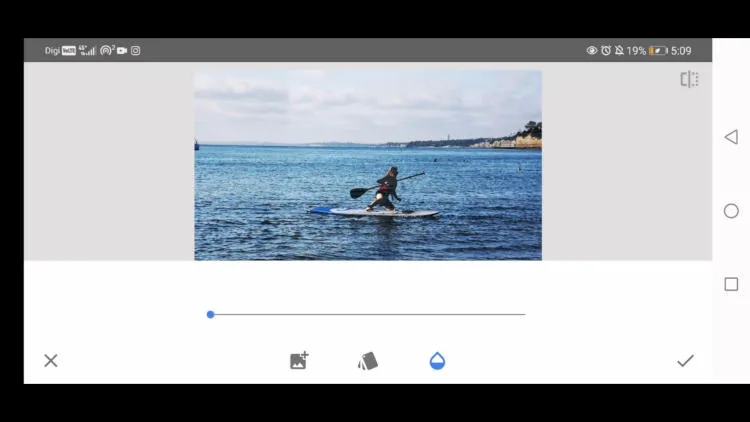
If you glide to the right, the second image is 100 solid, and the original image is now totally black.

But it doesn't matter, and it is totally fine. Confirm by clicking the tick button.
Click Edit Stack, then View edits


Choose Double Exposure in the stack of edits.

And then click the center icon.
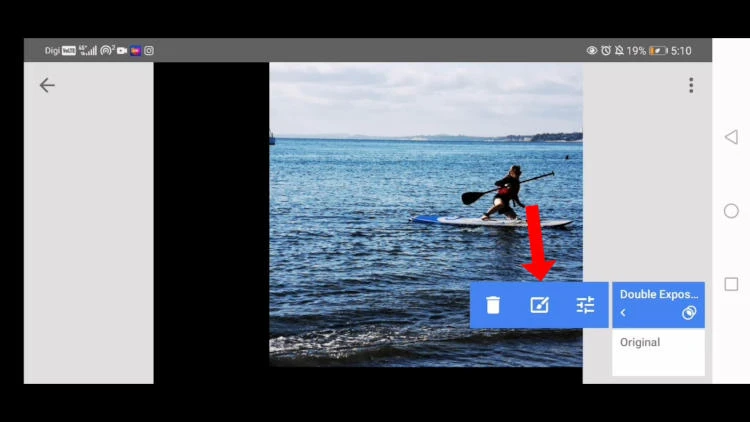
It looks like nothing much has happened. The object has not been removed yet. What you see now is still the original image with the object that you want to remove.
OK. Now we start to remove the object!
Make sure the Double Exposure strength is now at 100 percent. You can do so by adjusting it with the up and down arrows.

Zoom into the object.
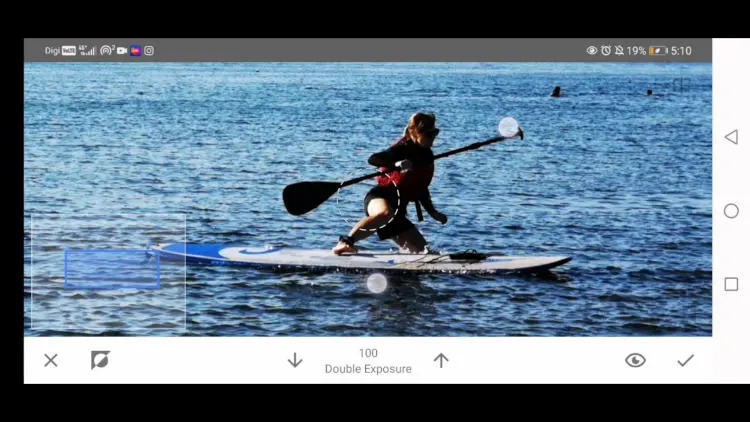
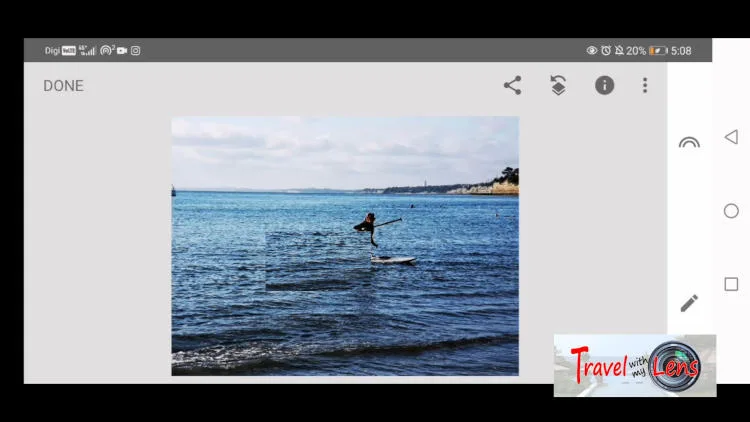
Draw on the object that you want to remove. This action is to apply the seawater part of the second image on top of the man and boat. The man and boat are hidden below and now disappear.
Note that you only cover up the man and boat, and therefore you still see the original image in other areas.
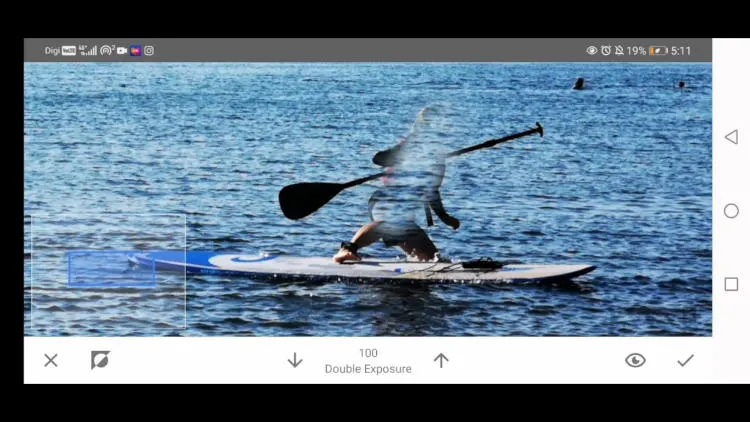
Since we use the selected part of the second image to replace the man and boat of the first image, the color can be slightly different.
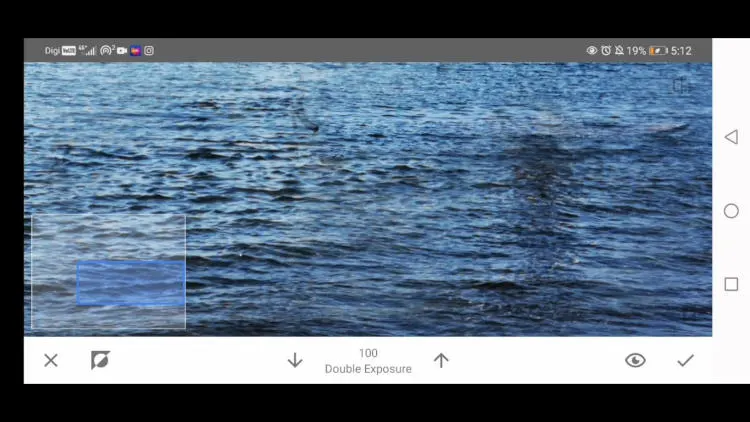
You can smoothen the color by using the Brush Tool. You can refer to another video about the Brush Tool if you are unfamiliar with it.
Open the Brush Tool.
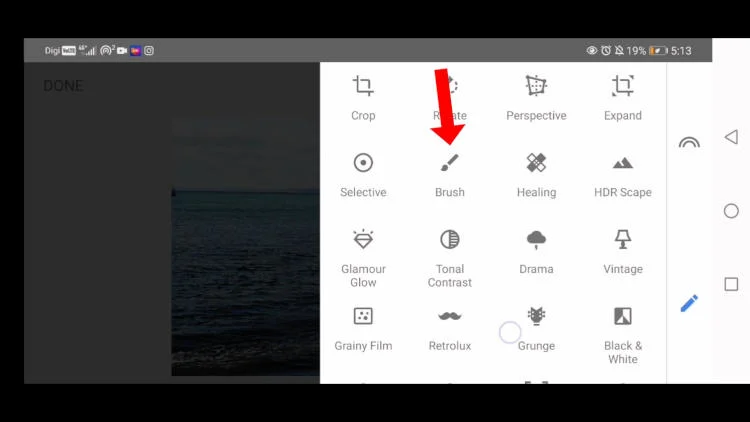
Choose the Dodge and burn option.
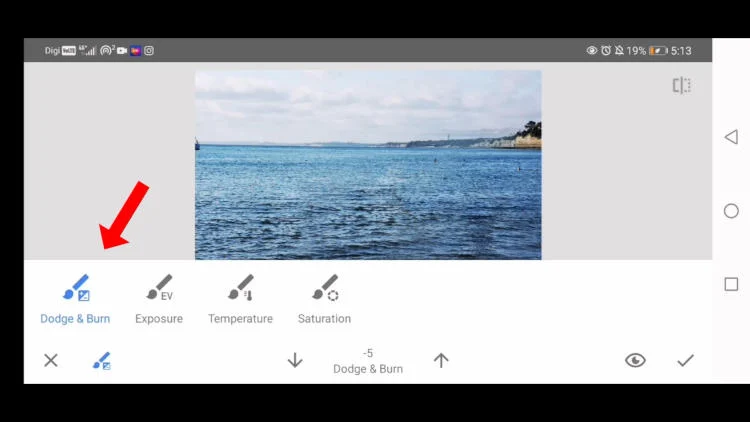
You can darken certain parts by setting the dodge and burn strength to negative or brighten up certain parts by setting it to positive.
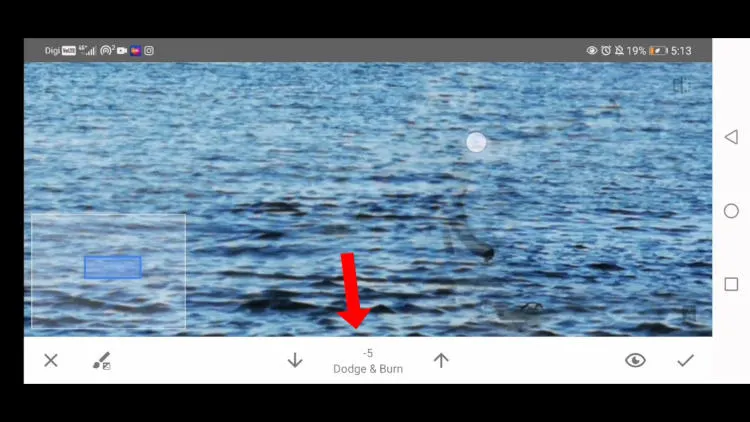
Paint on the area you want to darken or brighten. Once you are satisfied with the result, click the Tick button, then click Done to save the image.

Before and after
Let's take a look at the final result.
That's how to use Snapseed to remove objects in a photo. The easiest way to remove a small object is by using the Healing tool. It is far better to use the Double Exposure tool if the object is big. I’ve included the links to other videos in this Snapseed fundamental series.
Links to other tutorial in Snapseed fundametal
This image will look even better if you combine it with other tools.
- You can watch other videos on using Snapseed by getting back to the main page of Snapseed Fundamental.
- Alternatively, click the link below to access to other step-by-step tutorials:
- Tutorial 1: Tune tool - how to use it for the best result
- Tutorial 2: How to edit selected areas effectively with masking tool
- Tutorial 3: Glamour glow - a useful tool to improve light reflection
- Tutorial 4: How to edit food photos with stunning result fit for Instagram
- Tutorial 5: How to remove object of a photo (quick and easy)


PandaRush
Monday 26th of December 2022
I've been watching How to remove a large object with Transparency tool. After removing the object, the tutorial said its optional to use the Brush. How in the world do I get the brush tool after removing the object?? Thank you.
kwankp
Monday 26th of December 2022
Click TOOLS, then click Brush, and you will get into the brush mode.