In this article, I will explain how to use Snapseed to edit food photos to share on social media even if you do not get the best lighting and environment in the restaurant and cafe.
If you are new to Snapseed, it is a free app to edit food photos with your mobile, which has far more features available in most of the native photo editors of the mobile phone.
I will show you how to:
- First, remove the unwanted area for better composition with the Crop tool.
- Second, increase the contrast of the photo.
- Bring out the texture of the cake with the Details tool.
- Increase the brightness and saturation with the Tune Image tool.
- Use the Brush tool to increase the brightness of the plate.
- How to change what you have already edited.
Let’s get started.
1. How to use the Crop tool to remove the unwanted area of the photo
Open the photo in the Snapseed app. Choose Crop tool.
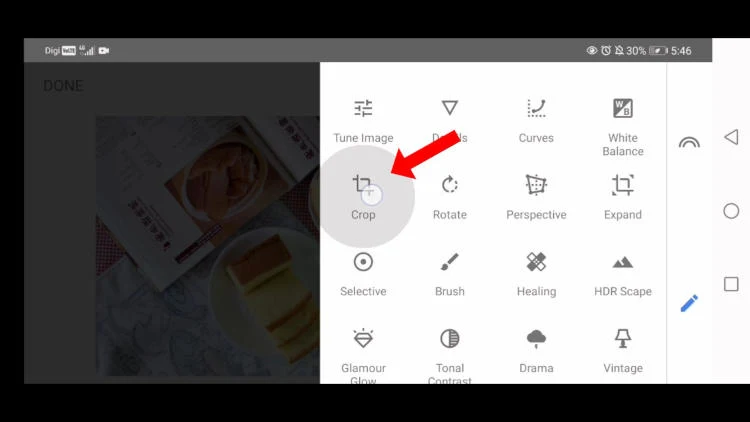
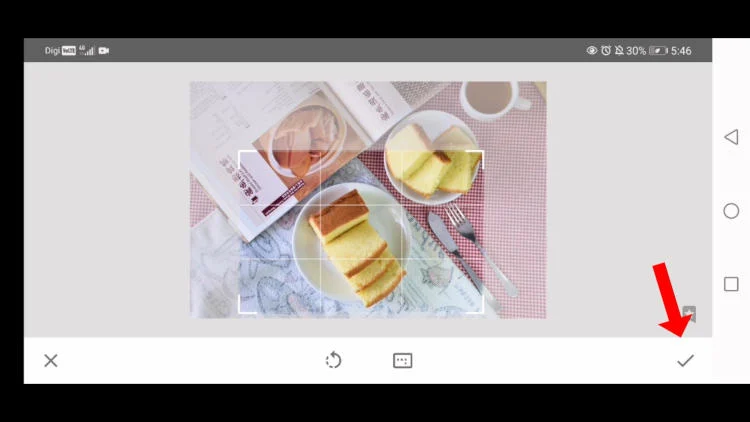
It will bring you to where you can choose the layout dimension. In this case, I choose the 3x2 aspect ratio.

Zoom in by using two fingers and then reposition it to the area that you want.

Once you are satisfied with it, click the Tick icon to apply the changes.
2. How to improve the contrast of the photo
Let's pick the Curves tool to improve the contrast of the photo. First, click the pencil icon, then choose and click the Curves icon.

Followed by clicking the Style icon.

It will bring you to a selection of styles. Since I want to improve the contrast, I picked the soft contrast preset.

It will automatically adjust the contrast by changing the shape of the curved line. You can also pick another preset to check the effect before clicking the Tick icon to apply the changes.

3. Bring out the texture of the cake with the Details tool
So far, we have cropped the photo to improve the composition and the contrast. Now you can enhance the texture of the cake with the Details tool.

There are two adjustments to this tool. The first one is called Structure. Let's zoom in to see the details of the cake.

Now increase the intensity of Structure but not overdo it as it can look artificial.
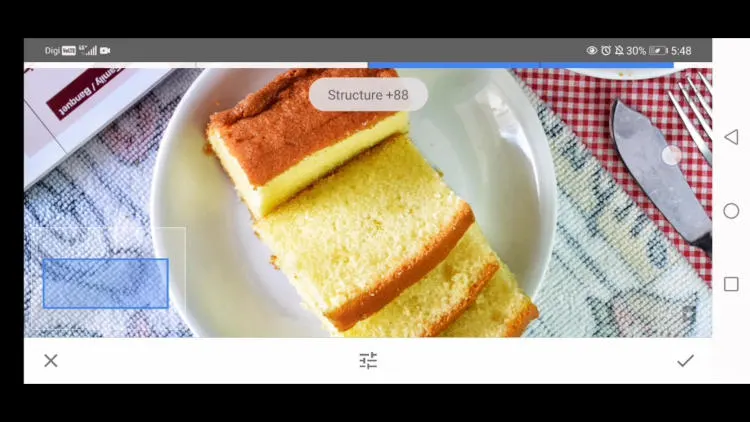
Next, back to the select icon at the bottom at the center and choose Sharpening.
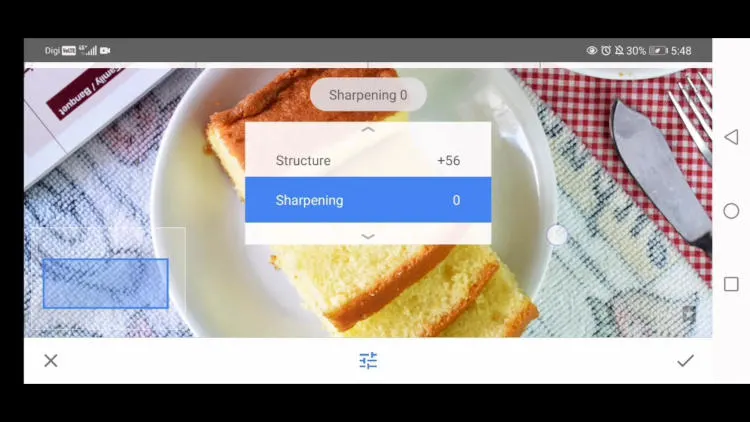
Once you increase the intensity of Sharpening and Structure, the texture of the cake is much improved.
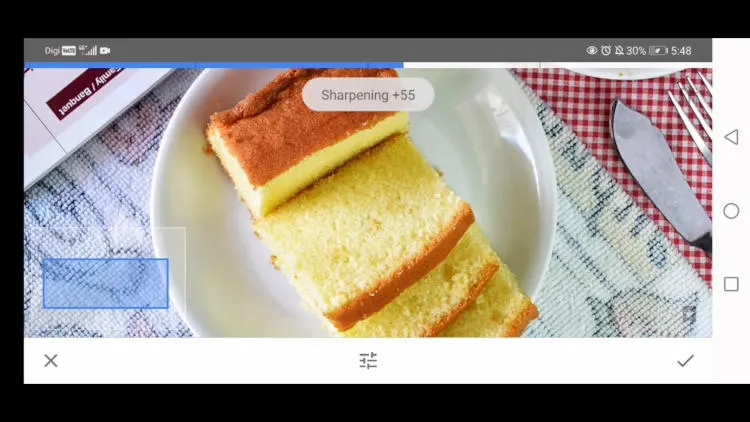
As usual, click the Tick button at the right bottom to save the setting.
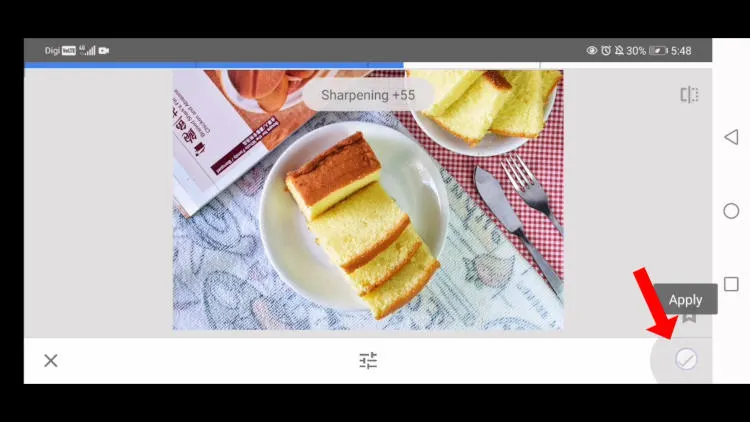
4. Increase the brightness and saturation with the Tune Image tool
Now let's use the Tune Image tool to adjust the brightness and the saturation. First, choose the Tune Image tool, and then select the brightness option.
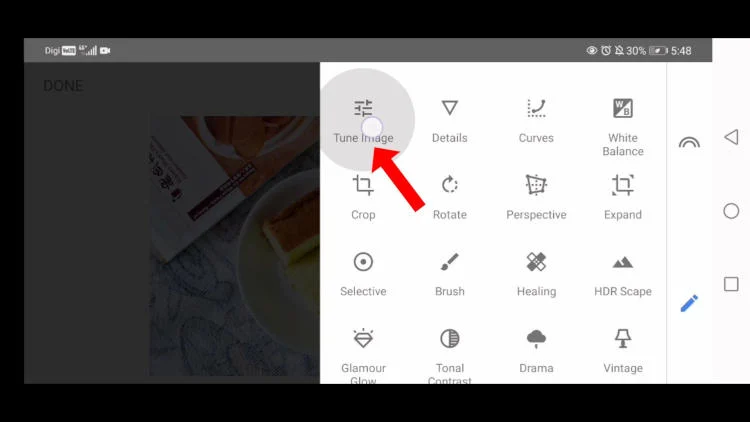

I will go ahead to increase the intensity of the brightness, the contrast, the saturation, and the highlights.

You can explore the effects by sliding each adjustment to the left and the right before clicking the Tick at the right bottom corner to save the adjustment.

5. Use the Brush tool to increase the brightness of the plate
The photo looks much better now. The cake looks great, but the plate looks a little bit too dark. So, I will use the Brush tool to increase the brightness of the plate specifically.
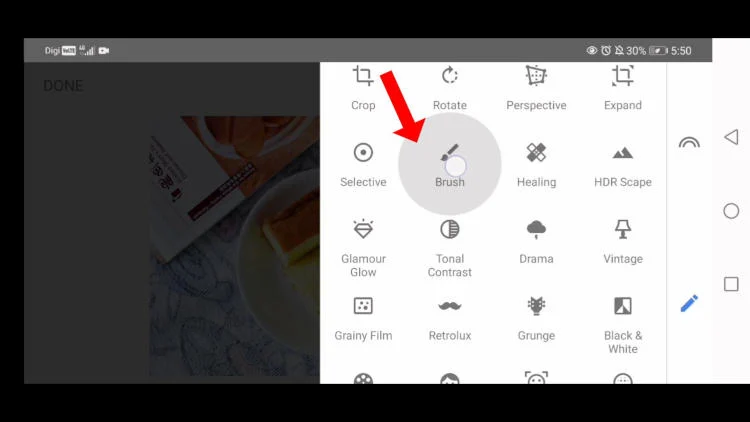
Once you choose the Brush tool, it will give you a menu with four options: dodge and burn, exposure, temperature, and saturation.
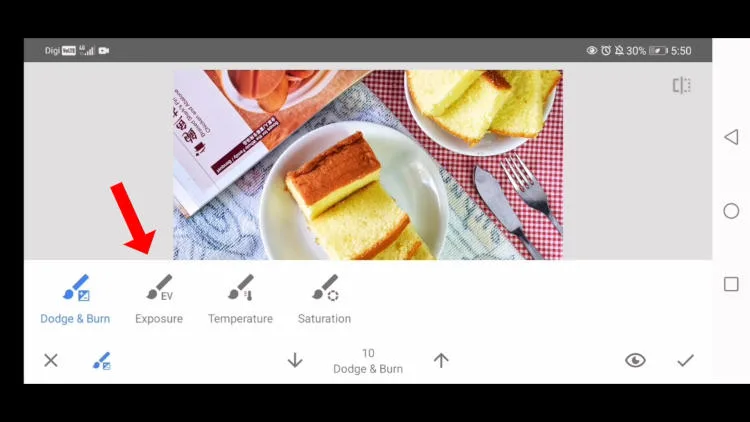
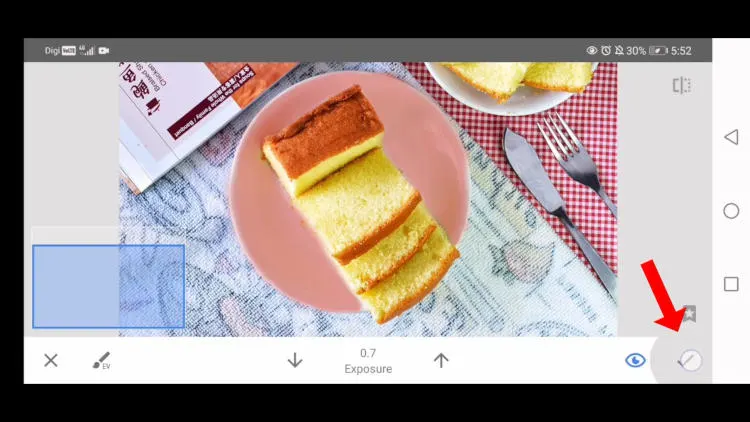
Choose the exposure option to brighten the plate, then click the arrow up icon to adjust exposure to 0.7.

Highlight the area that you want to brighten (the plate). The initial exposure is zero. Since I chose 0.7, the color will become brighter now.

Once you are satisfied with it, save the setting. Now the plate is brighter, but everything else is unchanged.
6. How to change what you have already edited
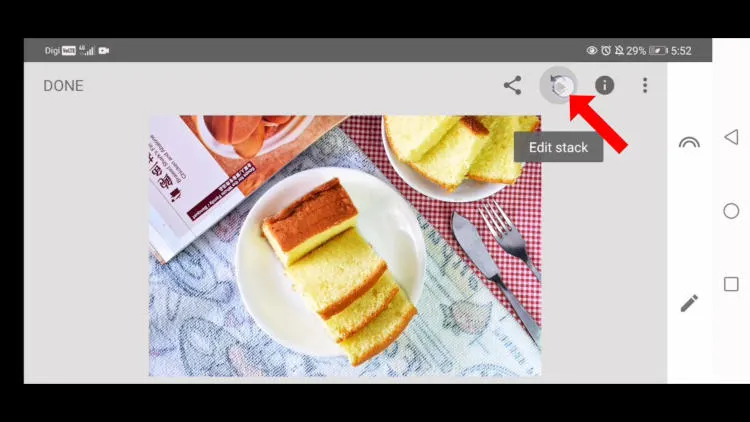
The photo now is already good enough to share on social media. However, I want to show you how to edit what you already saved if you ever change your mind. You can use the Edit Stack function to make the change when you edit food photos.
Click Edit Stack, and then View Edits.
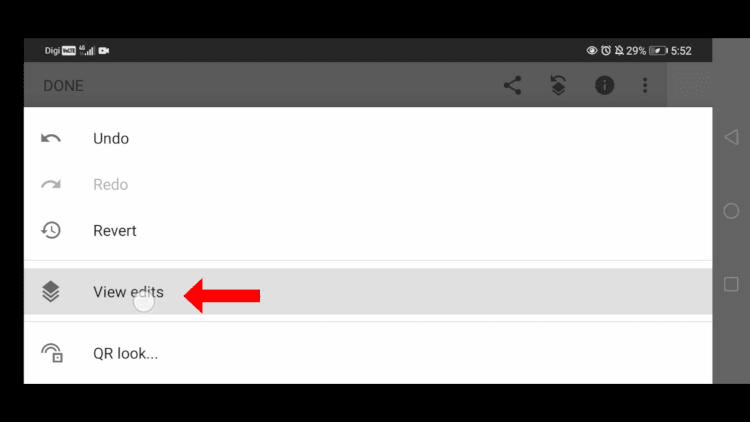
It will bring you to the stacks of edits that you have done so far. The first edit is shown at the bottom of the stack, and the latest one is on top.
If you want to crop the image again, click the Crop tool of the stack.
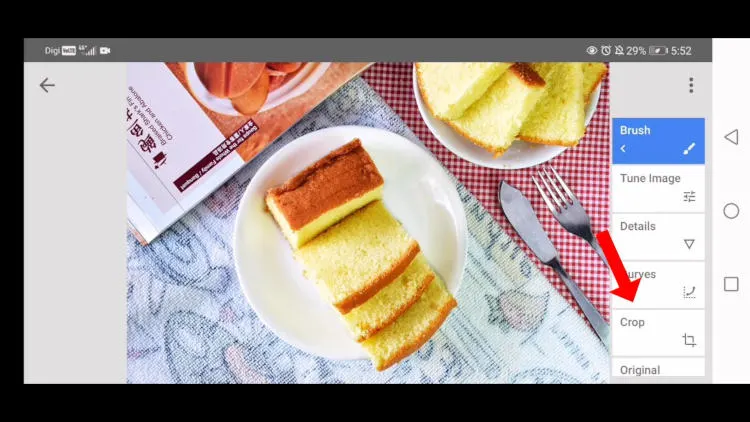
Then click the Adjustment icon that's the one with the arrows pointing to the right and left.

It will bring you back to where you have adjusted earlier., Now you can change the size of the crop and the position again.
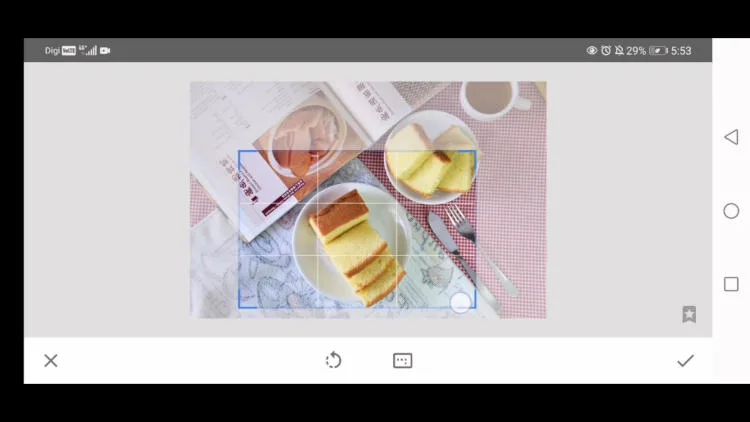
Click the tick button to save the new adjustment.
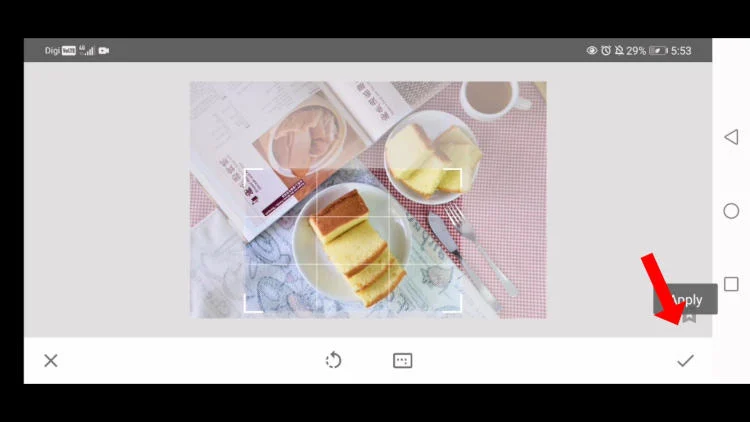
You can click and edit anyone on the stack.
Lastly, click done to save the image.
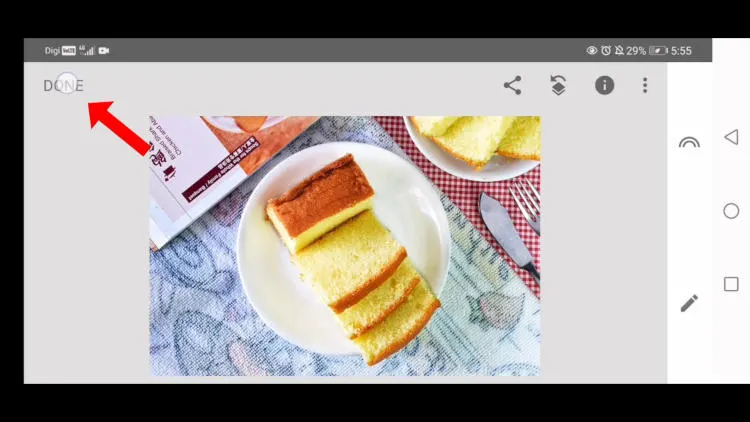
That's how to use a combination of different tools in Snapseed to improve the quality of a food photo.
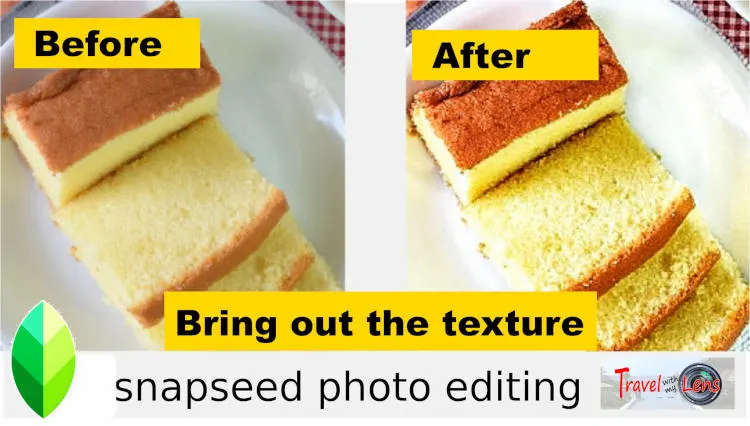
A quick comparison -before and after
Here is the comparison of before and after images.
Let's take a look at the final result. The texture of the cake is clearer. The color of the plate is lighter. We now have a photo that is nicely cropped.
Please click the before and after image below to watch the video version of this tutorial.
Links to other tutorial in Snapseed fundametal
This image will look even better if you combine it with other tools. You can get the links to other videos on using different tools in snapseed by getting back to the main page of Snapseed Fundamental.
- You can watch other videos on using Snapseed by getting back to the main page of Snapseed Fundamental.
- Alternatively, click the link below to access to other step-by-step tutorials:
- Tutorial 1: Tune tool - how to use it for the best result
- Tutorial 2: How to edit selected areas effectively with masking tool
- Tutorial 3: Glamour glow - a useful tool to improve light reflection
- Tutorial 4: How to edit food photos with stunning result fit for Instagram
- Tutorial 5: How to remove object of a photo (quick and easy)
