In this article, I will explain how to get the best out of the HDR mode of my mobile camera. Before I go into more details, let’s take a look at the pictures that I have taken by using the HDR mode and by the auto mode.


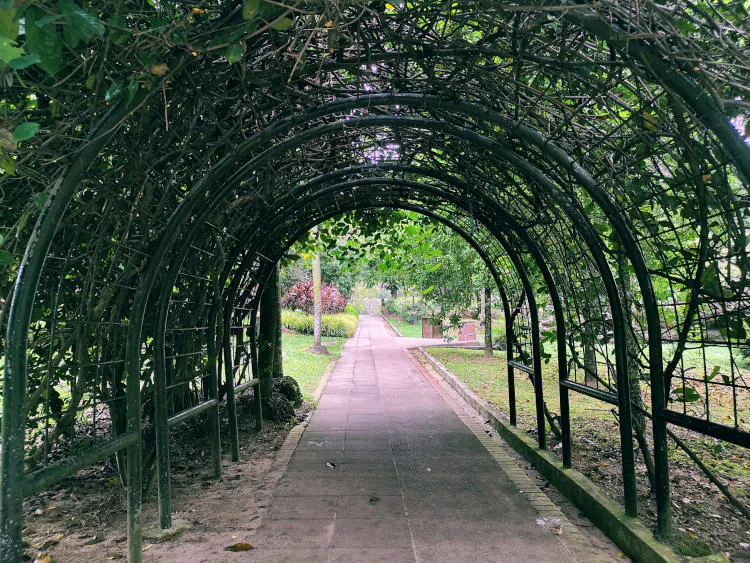
HDR Mode 

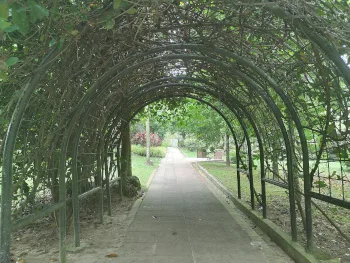
Auto Mode 
HDR with Snapseed
Since your camera sees things differently, the photo that you take will not be the same as what you see with your eye. HDR will be able to solve this problem, especially there is a big contrast to what you want to capture.
You can immediately see the different! The photo taken by the auto mode has a very big contrast between the tree under the arch and the background. The auto mode is trying to get the right balance of the exposure but fail to capture the detail of the part under the shade.
The photo taken with the HDR mode captures ALL the detail of the foreground and the background. However, the photo is lacking in contrast and does not look like what I see with my eye. To address this issue, I did some post-production adjustment with a mobile app called Snapseed, which result in the final image that looks exactly what I want.
HDR effect in various scenarios
HDR is the short form of High Dynamic Range. It improves the quality of the photos drastically if there is an extreme contrast in the photo. This extremity posts a challenge to the camera to capture all the details in a photo taken with only one fix exposure.
Let's take a look at each of them one by one:
Indoor photography

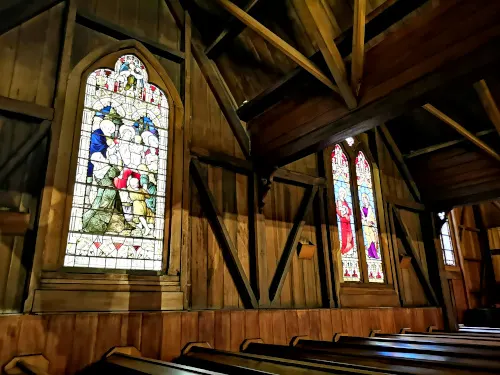
The HDR mode is able to capture the bright window and the dim interior of the building to produce a realistic image just like what you see with your eye.
Imagine you are in a majestic cathedral, hoping to capture the detail of the internal architecture, only to find out that the photos become too dark. You then open up the aperture and take another picture, but it turns out that the window is entirely white out.
Applying HDR mode will be able to capture the elegant architecture and the colorful window of the cathedral in one phot.
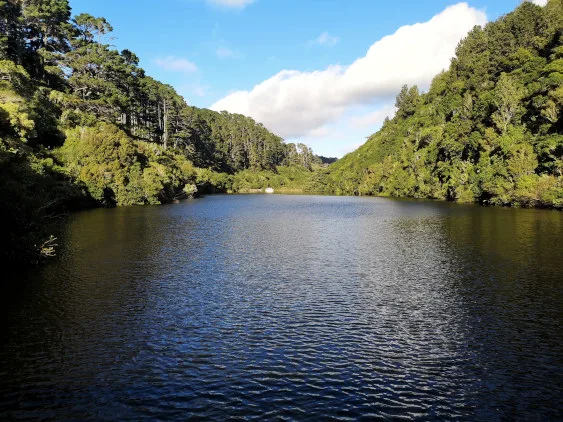
Landscape photography
Capturing a landscape photo with the bright sky, only to find out later the detail of the cloud are not even visible.
Since the sky is the brightest area of landscape photography, the beautiful texture of the cloud is ofter wipe out. HDR is a great way to capture all the detail between the dramatic contrasts between the sky and the foreground.

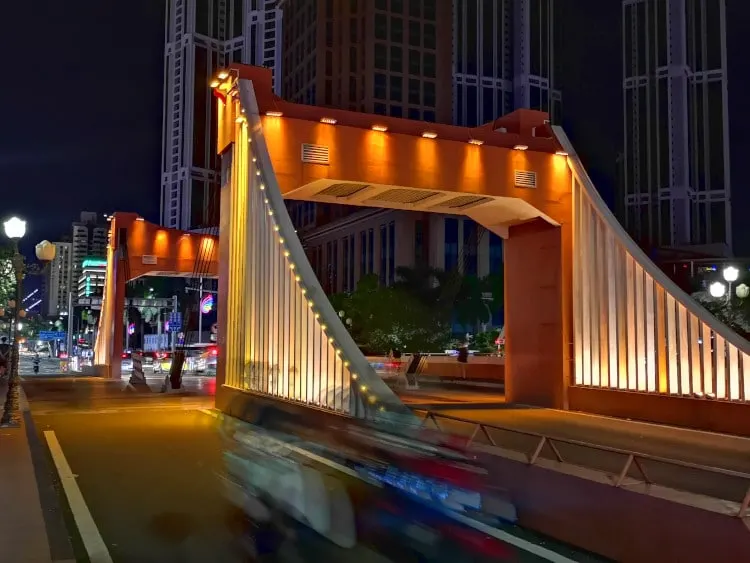
Night cityscape photography
Taking street photographs at night hoping to capture all the beautiful color of the light, but eventually lost most of the details. This problem arises from the high contrast between the bright light in the city and the dark sky at night. Again, HDR is an effective way to capture all the details conveniently.

How it HDR is working
What happens behind the scene is the camera taken three photos in a burst with different brightness setting. The underexposed shots will take care of the details of the brightest highlight (the background of the example above), the overexposed shot will capture the details of the shadow (under the arch), while the one with regular exposure will capture everything in between.
The photo app of your mobile camera will blend all three photos by combining the best detail register and present to you in one single picture.
In short, HDR will be able to extend the dynamic range that you can capture by combining all the detail in several shots with different exposure. Therefore it can retain the details of both the dark and bright area of the photo.
Before the invention of this HDR camera app, photographers have to take multiple photos with a different exposure, and then back to the computer to combine them manually. That will take a lot of work and usually will kill the interest of the casual photographer who doesn’t want to spend the time to do the extra work.
HDR with just one click
Here is the step by step method how to use the HDR mode for indoor photos with direct window light, landscape and, cityscape photography at night.
Since HDR photo is the result of the combination of more than one photo with different exposures, your camera has to be free from movement to let the camera app to take multiple shots of exposure in one single click of the shutter.
Fortunately, most of the camera app has the built-in stabilization mechanism to counteract minor movements, but it is best to use a tripod to get the optimum result.
How to use HDR mode - mobile camera
How to use HDR mode for the mobile phone camera.
Materials
- Any mobile phone camera with HDR mode.
Tools
- Just the phone camera alone, preferably with a tripod.
Instructions
- Open your camera app. Locate the HDR mode. The HDR mode is located at the top of the screen for iPhone. The location of the HDR mode for other Android cameras may differ from one brand with another. For example, the HDR mode of Huawei P20 pro is at more >HDR on the front screen. Once the HDR mode is activated, there will be a shown on the screen.
- Now tap the screen at where you want to focus. A white box (or circle for some mobile phones) will appear. Once the box or circle turn to yellow, the focus is set. Click the shutter to take the HDR photo.
Notes
It is always best to deactivate HDR whenever you do not need it. This setting is to avoid the camera app taking multiple shots every time you click the shutter, which will consume a lot of storage space of your phone. Besides, HDR photos will not produce a better result unless there is a big contrast of light in the pictures.