In this article, I will explain how to use masking tool in Snapseed to edit a specific portion of an image while leaving the other portions untouched.
If you are new to Snapseed, it is a free app to edit your photos with your mobile, which has far more features available in most of the native photo editors of the mobile phone.
I will show you how to:
- Edit only a selected photo area with the masking tool.
Once you have chosen the area you want to work on, all the editing will not affect the unselected areas. That means the masking tool allows you to work on a specific area of the photo only.
Here is how to use Masking tool in Snapseed
In the previous article, we show you how to use the tune image tool in Snapseed to improve the quality of the photo. However, any changes by using that tool to change the color, saturation, brightness, etc., will apply to the entire photo.
What if you only want to apply to specific parts, for example, only the sky and not the ground? You can do it with a tool called masking tool.
Let's get into the details.
Increase the color of the pavement and the steps
Open the photo that you want to edit in Snapseed.
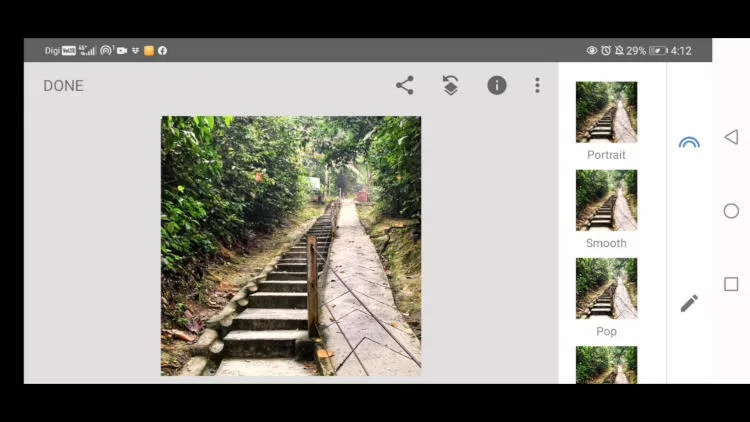
In this example, I want to increase the yellow color of the pavement and the steps. Although there are different ways to do it, a simple method is to use the Tune Image tool that you are familiar with. Then, scroll down to the last selection called ‘warmth.’

Then slide to the right.
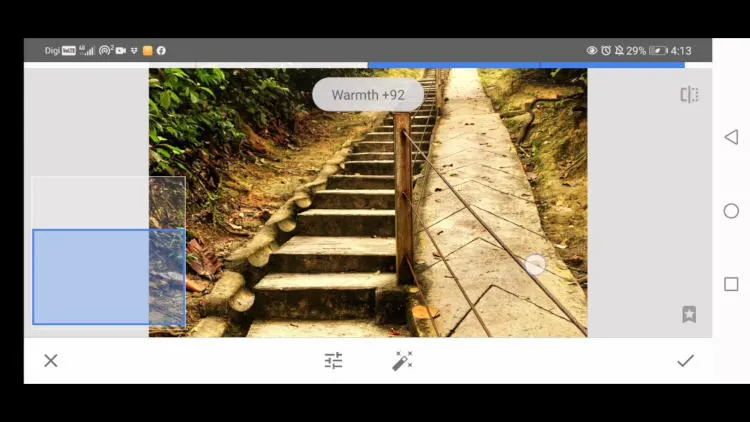
The color is now more yellowish, but it also affects parts other than the pavement and the steps. Here is how to do selectively apply the effect only to the pavement and the steps.
Save the changes by clicking the checkmark.

Next, go to the right top corner and look for the icon called ‘edit stack.’

Click that icon and then click ‘view edits.’

Finally, go to the right bottom corner, click Tune Image.
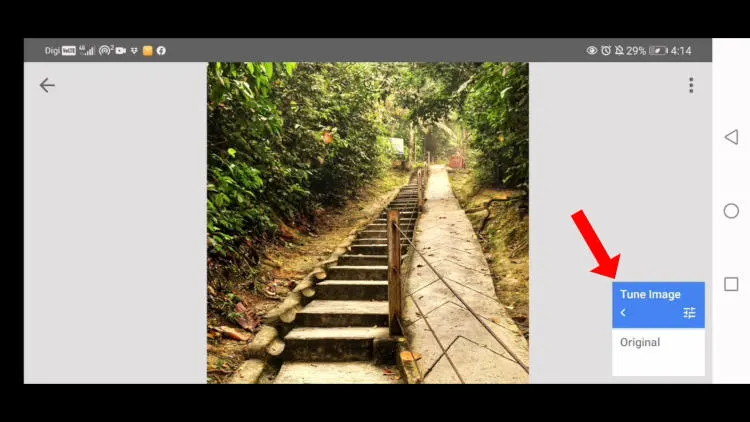
It will display three different icons. Click the center icon. Use two fingers to zoom into the pavements and the steps. Then, use a touchscreen pen or finger to draw on the parts you want to make changes.

You need to change the intensity of the color to 100, which means you are applying the full intensity of the color that you have selected in the Tune Image.
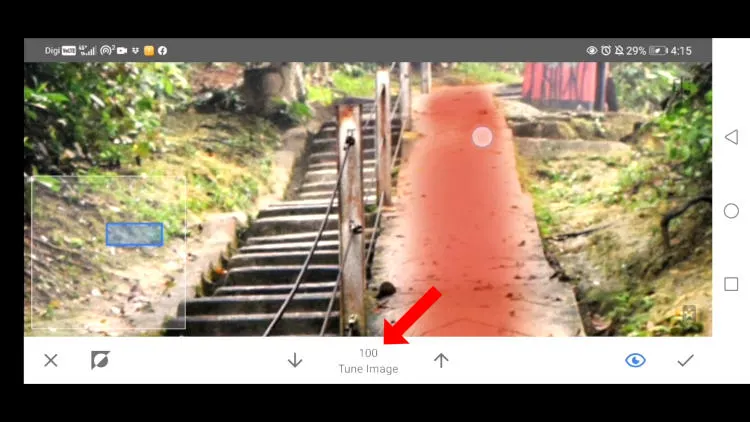
If you do not want to apply the full intensity, you can change it to 75 or even 50. In this example, I use 75 percent of the intensity on the steps since I don't want the steps to become too yellowish.
Note:
There is an ‘eye’ icon at the right bottom of the screen. If you switch off the eye icon (the color becomes black), you will see the intensity you are painting on the area. If you turn it on by clicking it, it will become blue. So now it will show the painted area in red.


You can compare how it looks before and after editing by tapping and holding the ‘book’ icon at the top right corner. It will show you how it looks before editing when you tap and hold it.

If you are satisfied with your edit, click the checkmark, then click the arrow at the left top corner to save the image. The color of the pavement and the steps has changed without affecting the trees in the background.

Increase the shadow part of the steps
I also want to brighten up the shadow part of the steps. So here is how I do it.
Use the Tune Image tool, and choose brightness. Slide to the right to increase the intensity to 75 for the shadowy parts of the steps to make it brighter. However, the whole image will become too bright, not only the shadow.

To make the brightness only apply to the shadow, go to ‘edit stacks,’ then click ‘view edits.’ (the same way as to make the pavement and steps more yellowish).
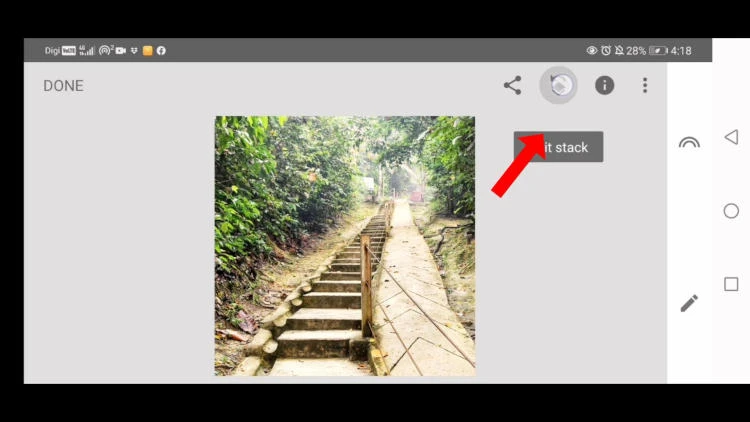
There are two Tune Image edits at the right bottom. The lower one is the first one we use, and the top one is the latest edit we are working on now.

Choose the most recent edit, and click the center icon.

Zoom in and highlight the part that you want to select. If you switch on the ‘eye' icon, you will see where you have painted. Now let's highlight the darker part of the steps and apply 100 intensity.
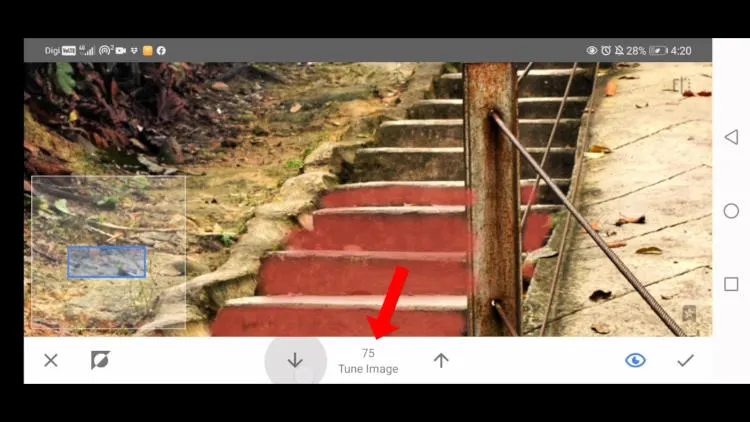
Change the intensity to 75 percent and apply it to the steps at the back, which are not so dark.

If you switch off the ‘eye’ icon to remove the red highlight, you will see what has been changed.
Click the checkmark, followed by the arrow at the left top corner to complete the masking.

Note: If you press and hold any part outside the image, it will show the original unedited image. If you release your hand, it will show what it looks like after the final edit.
Click the word 'done' at the left top corner to save the image.

Now the brightness and the color of the steps and the pavement have changed. Note that the trees at the back are not affected. Masking does not only work for the Tune Image tool but all other tools in Snapseed.
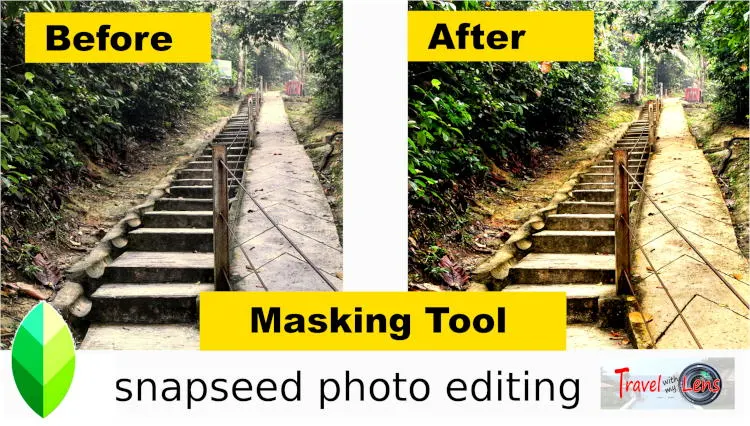
A quick comparison -before and after
Here is the comparison of before and after images.
Please click the before and after image below to watch the video version of this tutorial.
Links to other tutorial in Snapseed fundametal
This image will look even better if you combine it with other tools.
- You can watch other videos on using Snapseed by getting back to the main page of Snapseed Fundamental.
- Aternatively, click the link below to access to other step-by-step tutorials:
- Tutorial 1: Tune tool - how to use it for the best result
- Tutorial 2: How to edit selected areas effectively with masking tool
- Tutorial 3: Glamour glow - a useful tool to improve light reflection
- Tutorial 4: How to edit food photos with stunning result fit for Instagram
- Tutorial 5: How to remove object of a photo (quick and easy)
