In this article, you are going to read about my ten most practical tips which you can USE IMMEDIATELY to improve your mobile phone camera skills to the next level.
DSLR is no doubt the camera of choice to take professional images, but mobile phone camera has the advantage that it is always with you, and you can use it to take photos at any time, anywhere conveniently without the need of bringing bulky camera equipment especially on holidays.
Here is the list of my top ten tricks on how to boost your mobile phone camera skills INSTANTLY which work on iPhone and Android phones.
Note: This post may contain affiliate links. Please read my privacy policy for more info. I may receive commissions for purchases made through links in this post.
#Tip number 1- Hold the camera steadily
Unsteady handling of the mobile phone while taking photos is the main reason of getting blur images.
Blurring frequently happens as a result of using the virtual shutter on the screen while holding the phone with only one hand.
Blurring can be avoided by either:
- Holding the mobile phone with both hands while pressing the shutter. The volume button can be assigned as the physical shutter for most of the standard mobile phones. Turn on the camera and press the volume button to test whether the volume button is working this way. If not, activate this function at the setting tab of your mobile phone.
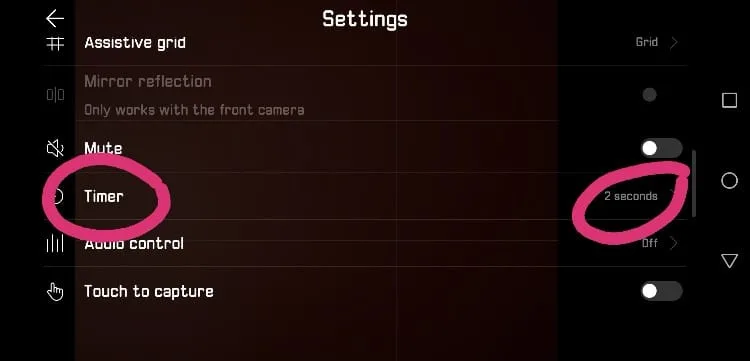
- Set the timer to two seconds (image above). Press the shutter and stabilize the camera with your hand. The shutter is only triggered after two seconds. This is the best way I find to avoid camera shake, as the shaking is mainly due to the action of pressing the shutter.
- Use a tripod. That is the best way to take photos with dim light and slow shutter.
#Tip number 2- Adjust the brightness

The phone camera will sense the overall brightness and displays the optimum brightness for each image. However, the automatic calculation may not be the brightness you want. Wrong brightness frequently happens when the light is dim, or there is a big contrast among objects in the image.
Press and hold on the screen to activate the brightness adjustment function. The function is displayed either as a slider which you can move up or down to fine tune the brightness or as a small sun icon which you can move it around. Move the sun icon to a brighter area of the image to reduce the brightness, or to the darker area to increase the overall brightness of the image.
As for iPhone, tap the screen at where you want to focus on, a slider with a small sun icon will show up. Slide up or down to adjust the exposure.
The first image in this section was taken with auto exposure, which has taken the lighting of the interiors and exteriors of the restaurant into consideration. As a result, you can hardly see the details of the interior of the restaurant.
The second image was adjusted by moving the 'sun' icon to the interior part of the image on the screen. It brightens up the interior and captures more details.
#Tip number 3- Use the panorama feature

The panorama mode can capture images with an extremely wide-angle.
To use this feature, turn on the panorama mode, press the shutter and pan the mobile phone horizontally in one direction to capture the whole area you want to capture. Once you stop panning, the camera will sense that you have completed and will start generating the image.
This is an awesome feature to take beautiful scenery during holidays.
The first image in this section was taken with wide angle F 1. 8. The second image was taken with the panorama mode. The panorama mode captures a wider angle than most of the widest lens available in the mobile phone camera.
Besides taking horizontal pictures, you can also alter the settings to pan vertically.
You need to pan the camera steadily to get a clear picture. The image can become slightly crooked if you move the camera up and down during horizontal panning. The twisted line may not be noticeable in most cases but can be obvious if there are horizontal lines in the image.
Mount the mobile phone on a tripod and rotate it slowly to get the crystal sharp panoramic image.
Panning slowly also helps to get a sharper image.
#Tip number 4- Forget about the zoom


Get closer to the object to take the snap if you want the object bigger. You will get a clearer picture this way than snapping it far away by using the zoom feature of the phone.
Most of the mobile phone camera is using digital zoom to enlarge the image. In simple term, it enlarges the image without adding details. As a result, you will not be expected to get very sharp images this way.
Get closer to the object to take the pictures to capture as many details as possible.
Another disadvantage of zooming is that even minimum shaking will be magnified due to the distance from the object.
The first image of this section was shot without zoom, hand-held. The second image is to shot at a distance stabilized with a tripod and shot with 10x zoom.
Both images are cropped to focus on the price tag. You can read all the words clearly in the first image. As for the second image, the zoom function causes a loss of details, and it is hardly able to read the word right below the price tag "RM5. 19".
You will get images that are bright and sharp every time with the above tips. But you can easily improve your mobile photos beyond just sharp and clear by applying the following tips.
These are the fundamental photography techniques that can be used easily with the mobile phone camera. These are the most straightforward techniques which yield the best result.
#TIP number 5- Get a mini tripod

You do not want to burden with the bulky tripod on holiday unless you are on a photography expedition. That is why I suggest you get the best out of the mobile camera.
The conventional tripod is heavy and cumbersome to carry. I suggest you get a lightweight mini tripod for holiday photography. You can dramatically improve your photography potential with this simple tool.
You can use it for:
- Taking photographs for yourself along with the timer. You have the flexibility to compose and make all the adjustment with the camera mounted on the tripod. This is far superior to taking a selfie unless you only want to take a quick photo without caring about the composition of the photo.
- You can take fantastic night scenes with the use of a tripod. You can open the tripod leg and put in on an object, or close the legs and support it with your body or against a lamb pole or tree trunk. A stable phone allows you to take beautiful night scenes with slower shutter speed.
The image above was taken with 4's shutter speed, F 1. 8 with the tripod supported against the lamp post.
#Tip number 6- Make use of the inbuilt grid
The rule of third is a basic principle for photo composition.
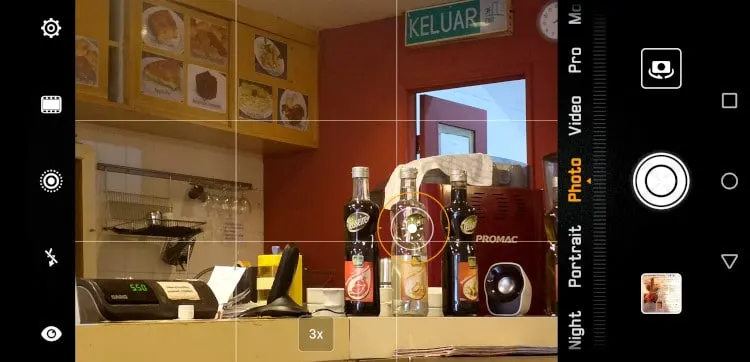
Photos look more pleasing and natural if the main subject is not positioned at the center of the picture. This perception is because people tend to think if the subject is right in the middle, then it must be done intentionally. Hence, the photo will look more natural if the subject is positioned slightly off-centered.
The in-build grid of the camera divides the screen into nine sections.
Try out by composing your photo so that your main subject is placed at one of the meeting points of the four grid lines on the screen.
The rule can be broken, however, if you find that it does not make sense for your intended composition, but it works well in most of the cases.
#Tip number 7- Focus on the main subject
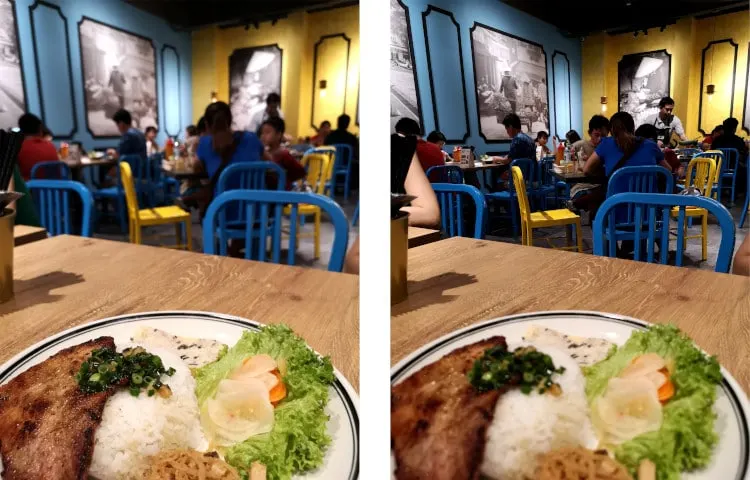
Autofocus works most of the time, but if you are using a large aperture and close to the subject, the automatic mode may not focus precisely on the subject that you want, which result in an out of focus image.
You can manually adjust the focus by tapping the screen at where you want to focus.
As an example, I want to take the picture of my lemongrass pork chop at the Vietnamese restaurant. The autofocus actually focuses on the background. (image on the right). I tap the screen on my pork chop rice and immediately change the focus to highlight the food, which is the main subject of my photo. (Image on the left).
Similarly, close up images with shallow depth of field need accurate focusing to get a sharp image of the subject and blur-out background.
#Tip number 8- Make use of the leading lines
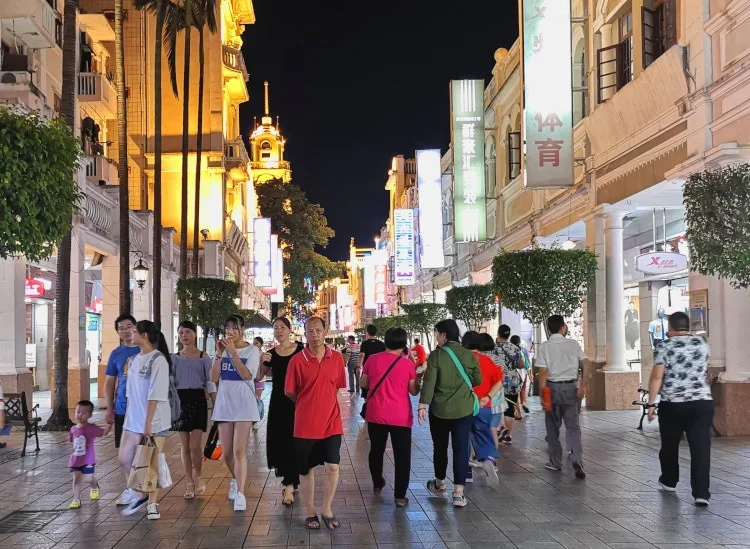
The rule of third is a straightforward technique that works well in most cases. Another other easy method is to place the subject at where the lines are pointing to.
Our eyes tend to follow the direction of the lines. These lines can either be straight or curved lines. Placing the subject at where all the vertical, horizontal or curve lines converge on the subject of your image.
The image above has all the leading lines pointing to the group of tourist strolling at the Sun Wenxi Road pedestrian street I visited recently.
#Tip number 9- Highlight the reflection
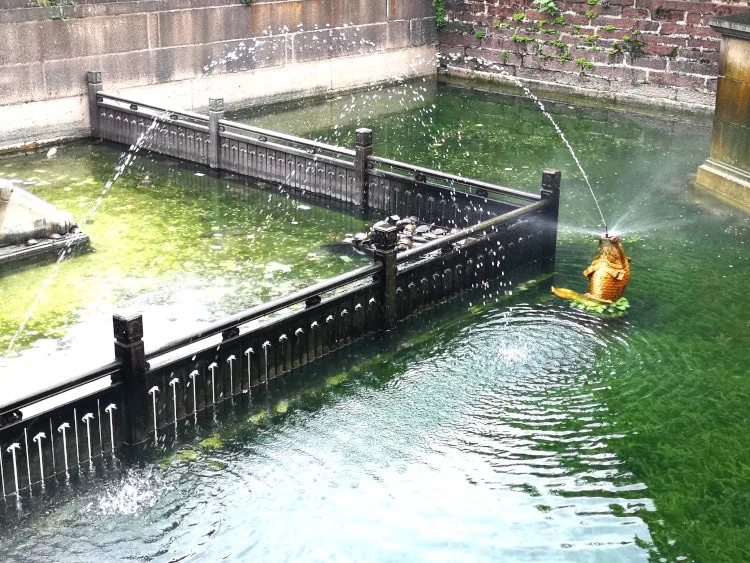
Reflection is an attractive target to take a beautiful photo.
You can either freeze the water movement by using faster shutter speed. This can achieve by using the auto mode of your mobile phone camera.
If you want to show some movement of water, choose the night mode which will pick a slower shutter speed. You do not have full control of the actual shutter speed though, but this is a ‘cheat’ way to get the job done especially you do not have time to make precise adjustments of your camera during your holiday.
If your camera has the option to adjust the shutter speed, choose a slower shutter speed for the effect of 'flowing water'. Use a tripod for stability to avoid shaking.
The above nine simple tips are the easiest (and most effective) ways to improve your mobile camera skill. These are the basic methods that can be used immediately. Certainly, there are many more techniques that can be used for the mobile phone camera, some are mobile specific, and some are not. Those techniques will be too able to include in this short article and to be discussed in a separate post
Title jjfjf j fjkf djf


oznor_vivid
this is the first column
This is a paragraph
