This article will explain how to use the glamour glow tool in Snapseed to edit a landscape photograph. If you are new to Snapseed, it is a free app to edit your photos with your mobile, which has far more features available in most of the native photo editors of the mobile phone.
I will show you how to:
- Use the Glamour Tool in Snapseed to increase the intensity of the sunray and make the foreground pop.
- Use the Selective Tool to select the area you want to apply the saturation, contrast, and more.
- Use the Curves tool to make the grass greener.
Let’s get started.
1. How To use the Glamour Glow tool
Let's open up the picture you want to edit with Snapseed.
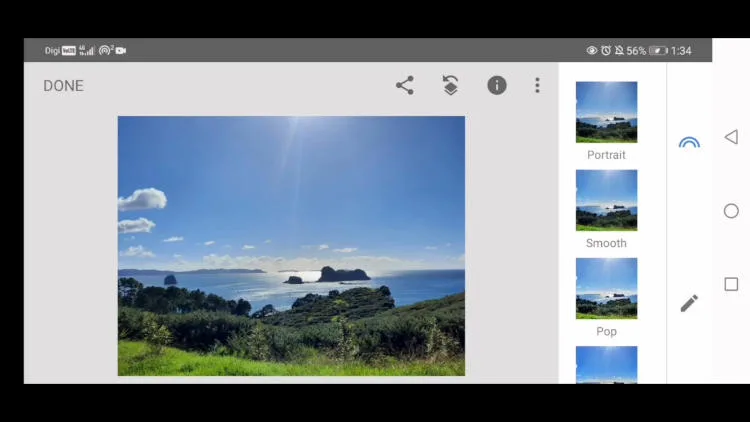
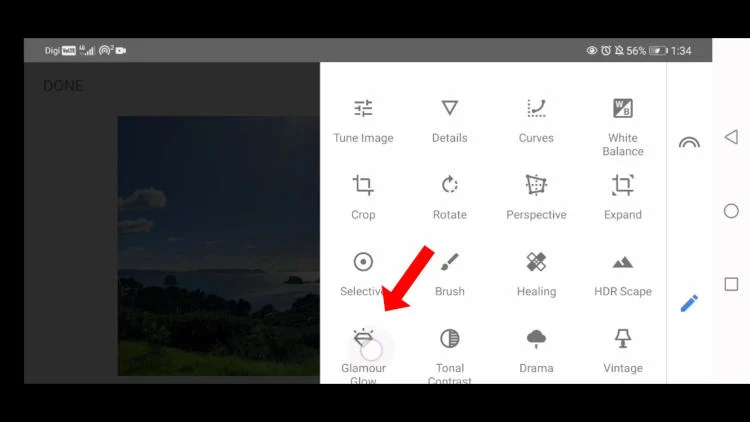
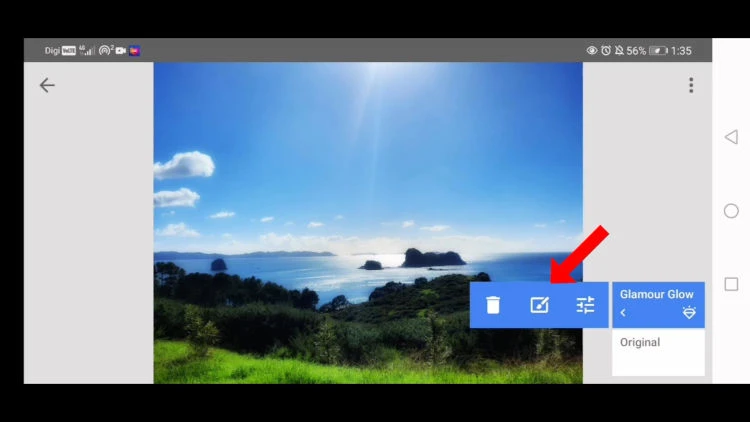
Once you get there, click the pencil icon and then choose Glamour Glow.
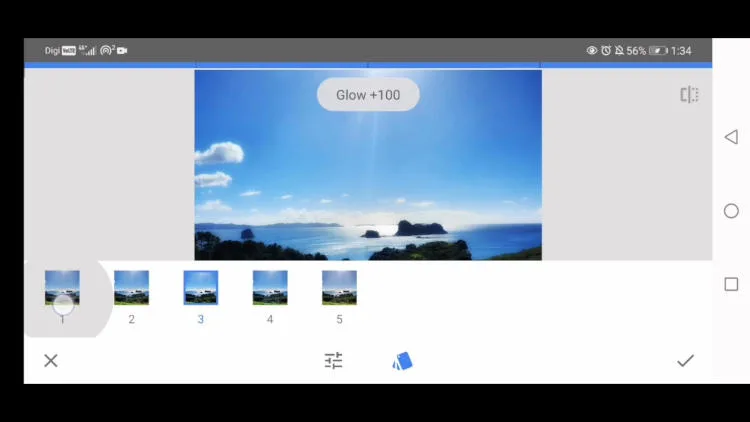
That will bring you to the following menu that shows you five presets. Each preset has a predetermined selection of glow effects.
You can pick any preset or click the icon with the arrow to the left and right to reveal the preset’s setting. Over here, you can adjust the saturation or warmth by sliding it to the left and right.
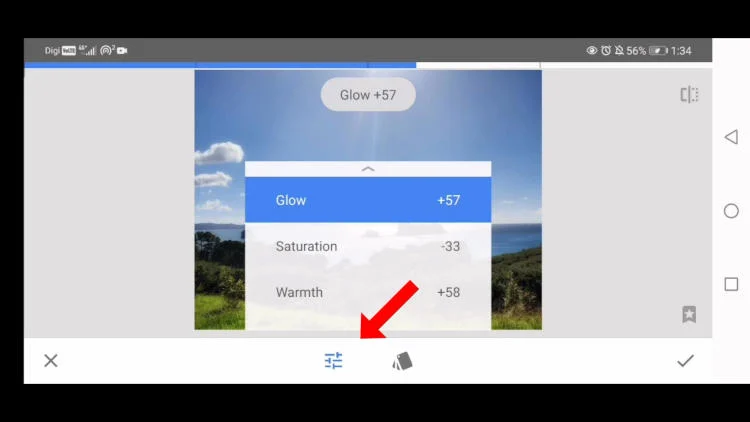
In this case, I feel that one of the presets is good enough. So I click the Style icon, go back to the previous menu, and then choose preset number three.
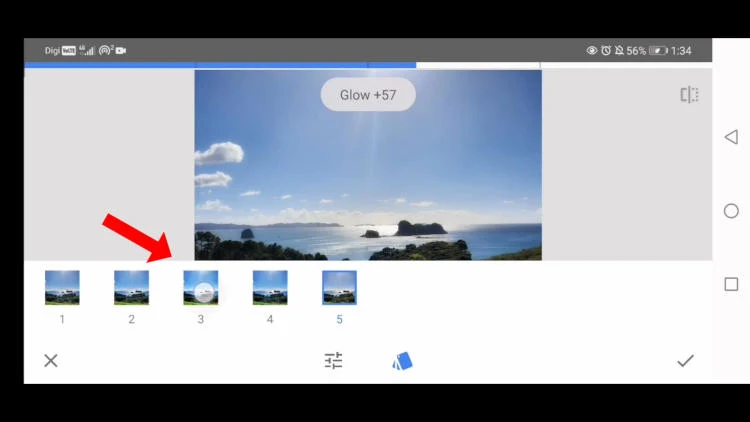
If you click the left-right arrow button, it will reveal each setting within this preset. I’m satisfied with the result of this preset, so I proceed to click the Tick button to apply the changes.
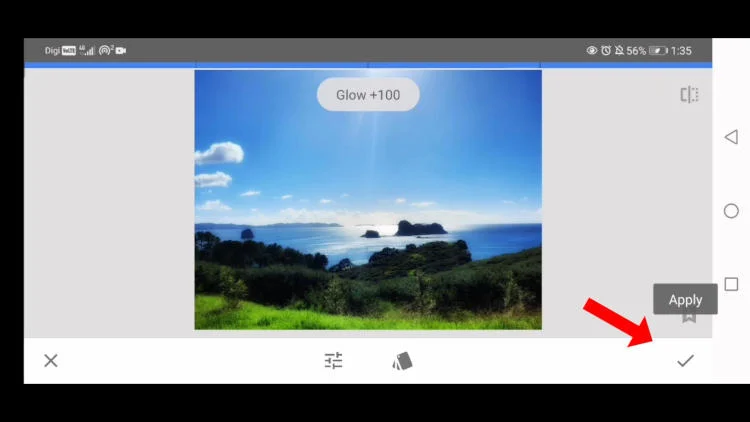
However, the glow effect is now applied to the whole image. I intend to only apply the glow effect to the sea and sun and exclude the greeneries. To do this, click Edit Stack, followed by View Edits, and then Glamour Glow.
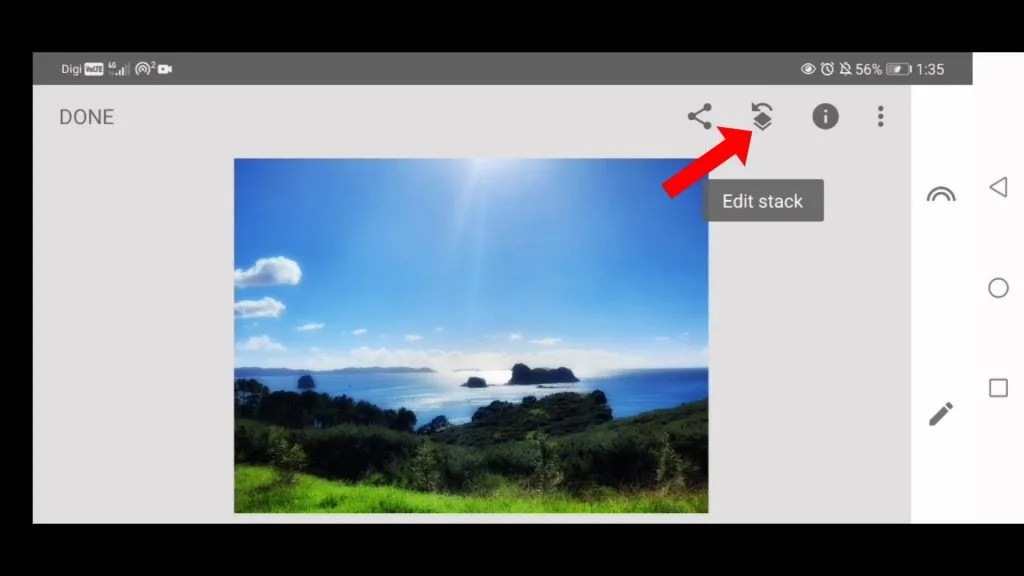
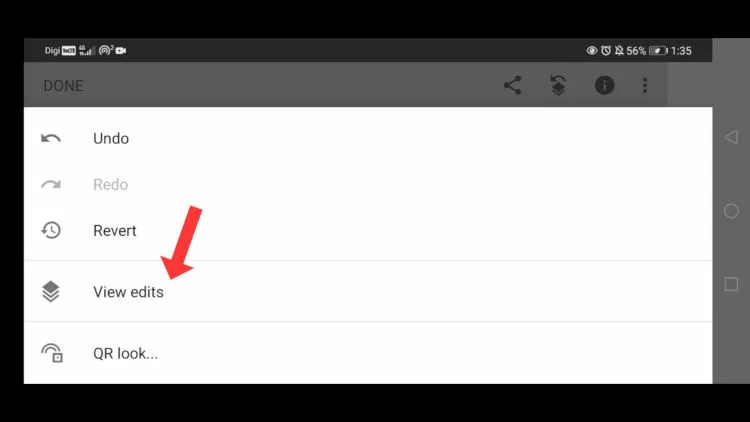
Click the center icon to start editing the image.
Now zoom in and draw on the area that you want to apply the glow effect.
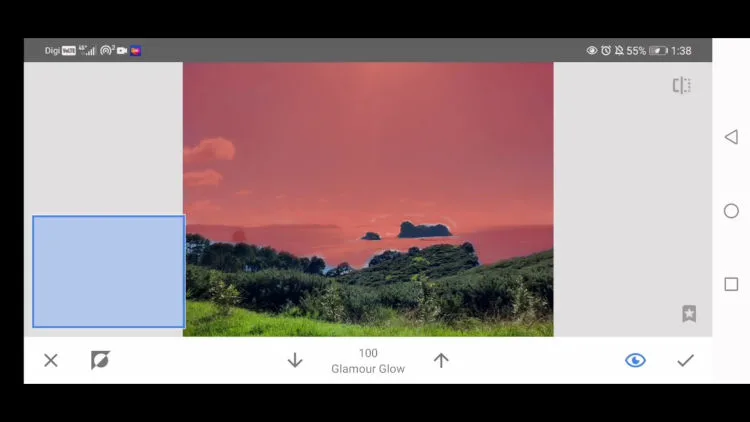
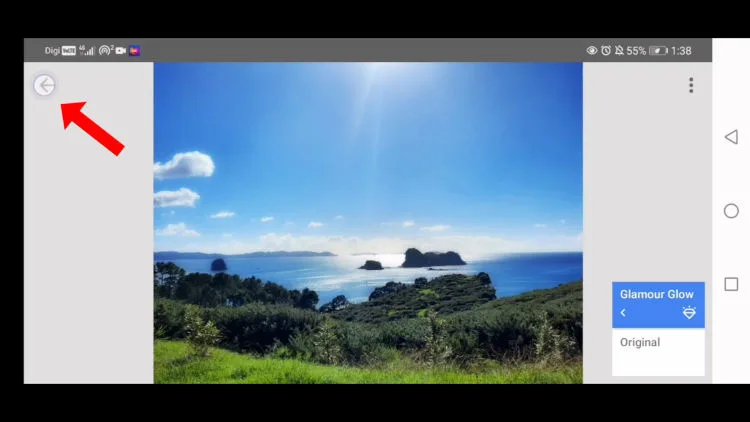
Click the Tick icon to confirm and the Arrow at the left top corner to exit Glamour Glow.
2. Increase the glow of the sunray with the Selective tool
Now let's move on to open up another tool called Selective Tool to brighten up the sunray.
Zoom in and tap the area near the sunray. Slide to the right to increase the brightness.
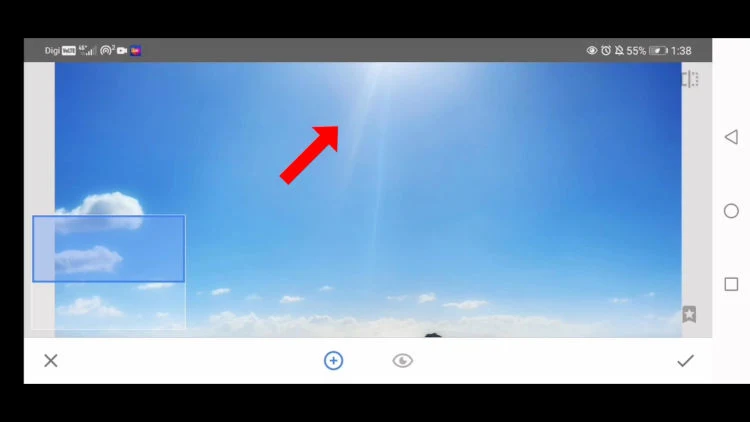
You can also adjust brightness, contrast, saturation, and structure with the same method.
I'm not going to change these settings right now.
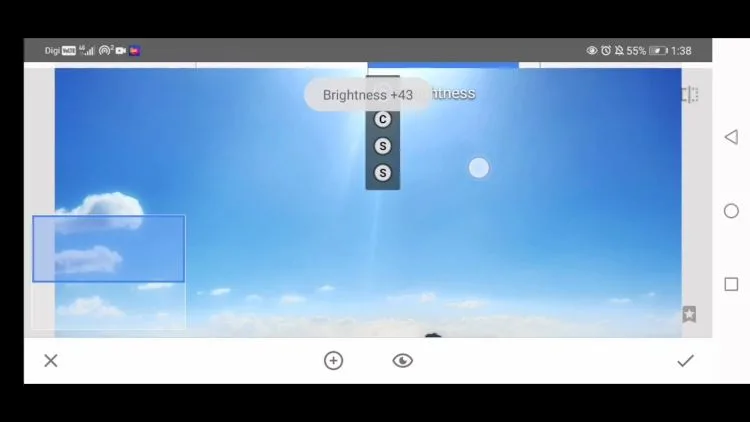
Adjust the size of the area that I want to apply the brightness by using two fingers to zoom into the chosen area.
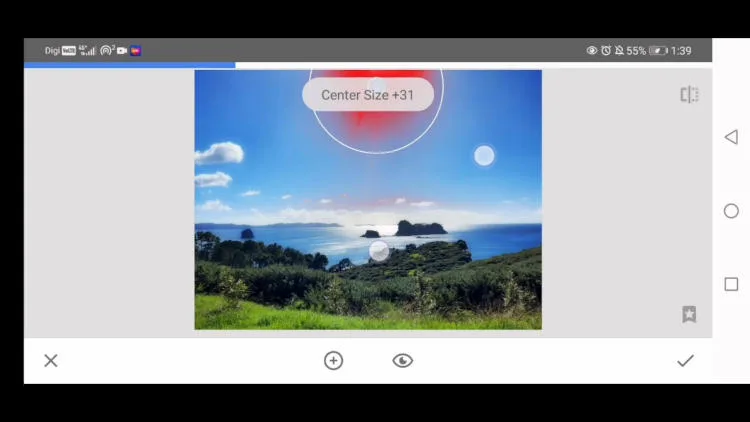
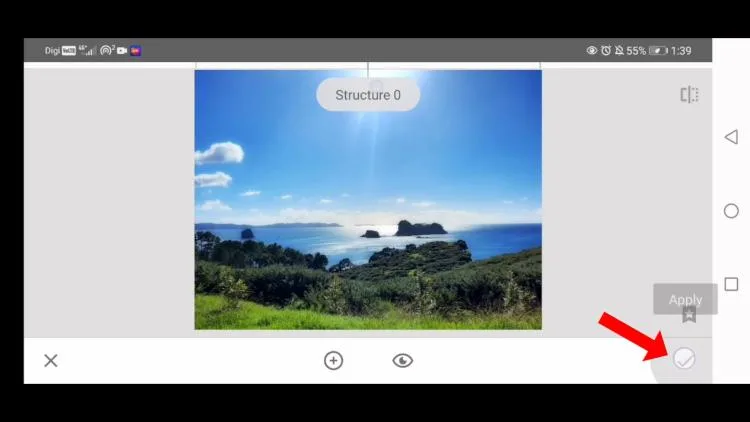
Now the brightness is only applied to the area that is near to the sunray. Next, click the Tick button to apply the changes.
Brighten the reflection with Selective Tool (use the copy and paste function)
Besides the sunray, You can also improve the image by brightening up the sea’s reflection with the Selective Tool.
Open up the Selective Tool once more, and this time tap on the reflection of the sea.
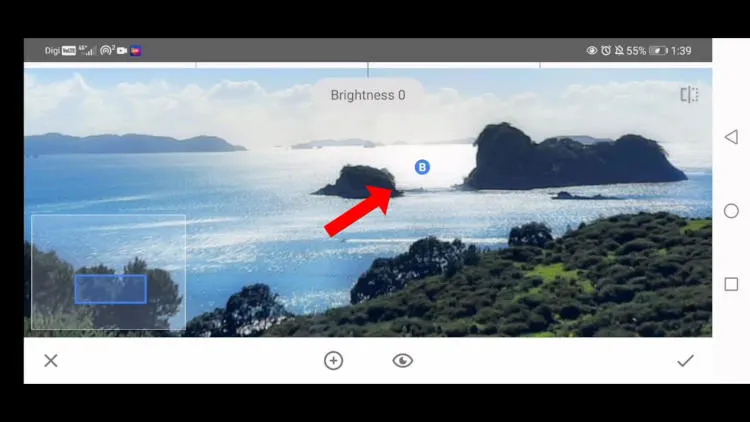
Zoom in to the part of the sea that you want to brighten up, and slide to the right to increase the brightness.
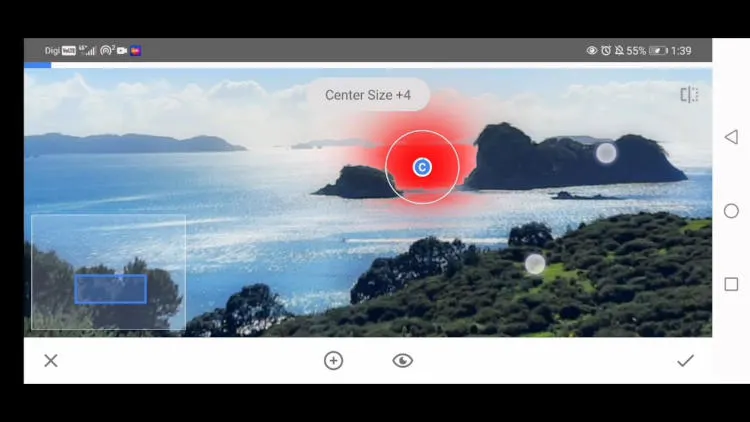
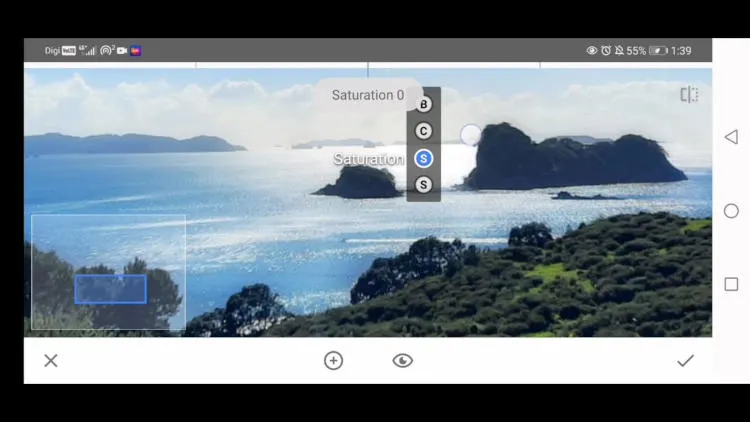
Slide down to adjust the contrast and the saturation.
Now it comes to the exciting part. If you tap again on where you're working, it will reveal a ‘Copy and paste icon.’
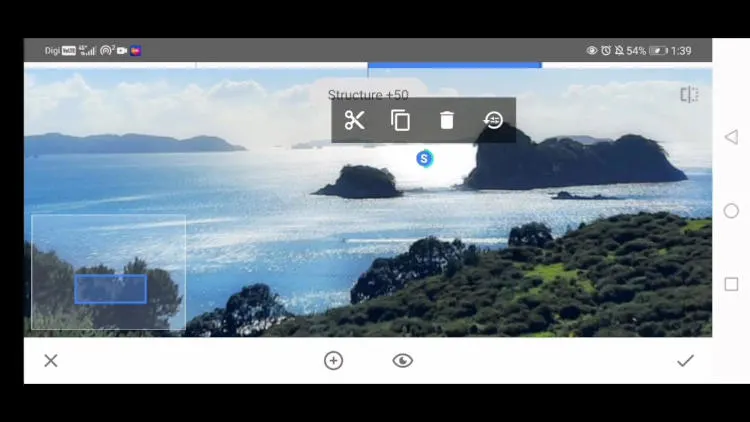
Tap on the ‘Copy’ icon,
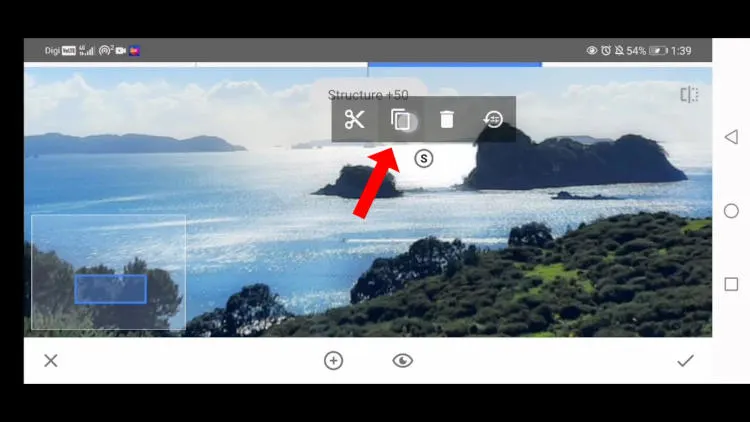
Then tap again on another area of your choice that you want to have the same effect as the first area, the ‘Paste’ icon will appear.
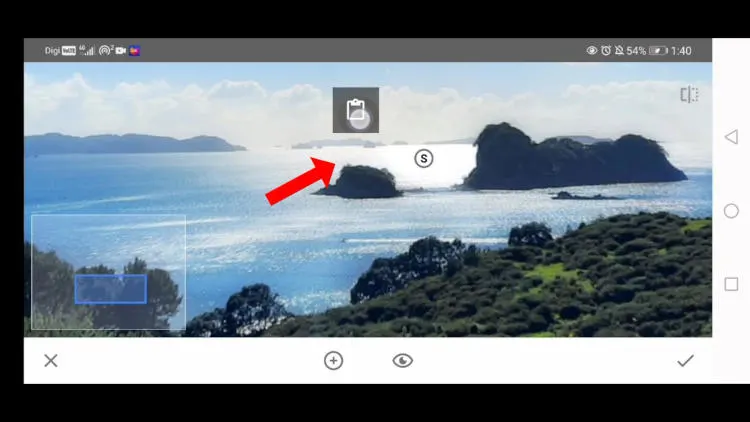
Tap the ‘Paste’ icon again. You are now copying the same effect of the first area to the new area. You can continue to tap other areas to paste the same effect at multiple areas.
Once you have done the multiple pasting, click the Tick to apply the changes.
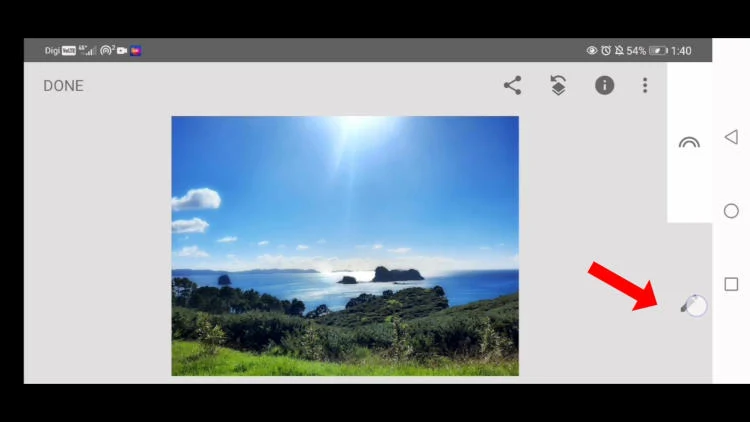
3. Brighten up the foreground
We have increased the glow of the sunray and brightened up the reflection of the sea. How about the greens in the foreground?
You can use the Selective Tool again to brighten up part of the foreground. It makes sense since the now stronger sunray should also brighten the foreground.
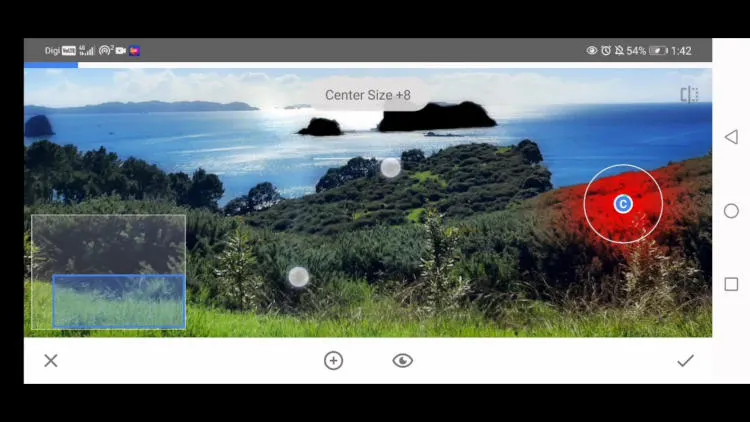
Use the Selective Tool to increase the brightness and contrast. I also improve the intensity of the Structure so that the trees in the foreground are now more well-defined.
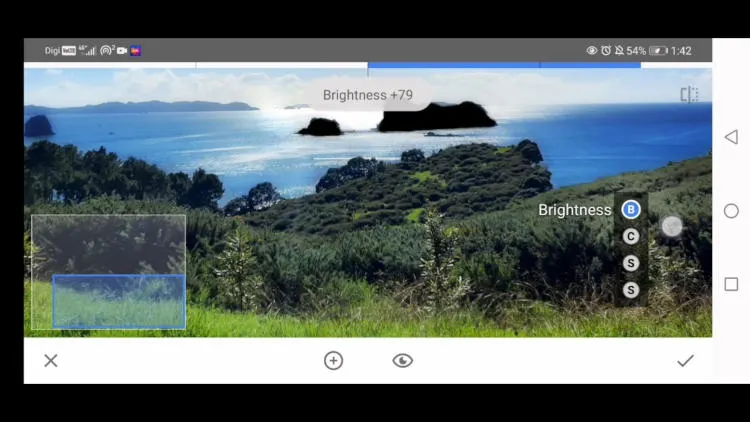
Once you have completed the first area, do the same by ‘Copy and paste’ to paste the same setting to other areas.
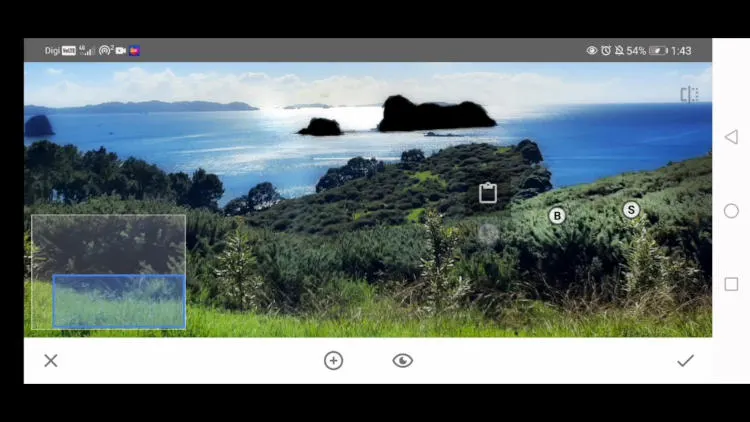
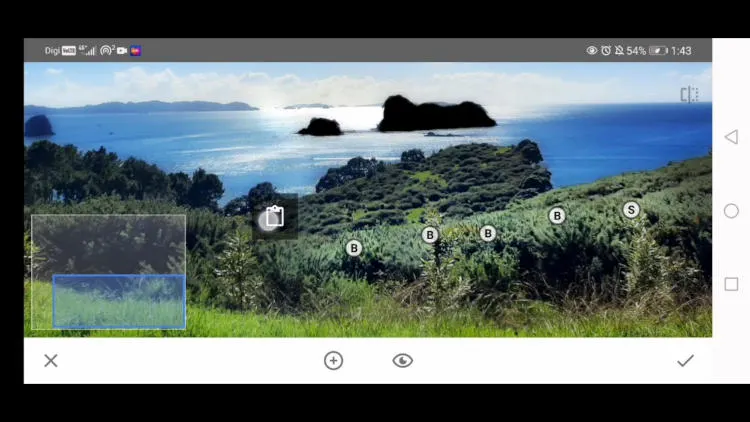
Click the Tick button to save.
4. The bonus step
I'm going to show you how to use the Curves Tool to make the grass greener.
Open up the Curves Tool.
There are three icons at the bottom. Select the one that's on the left.
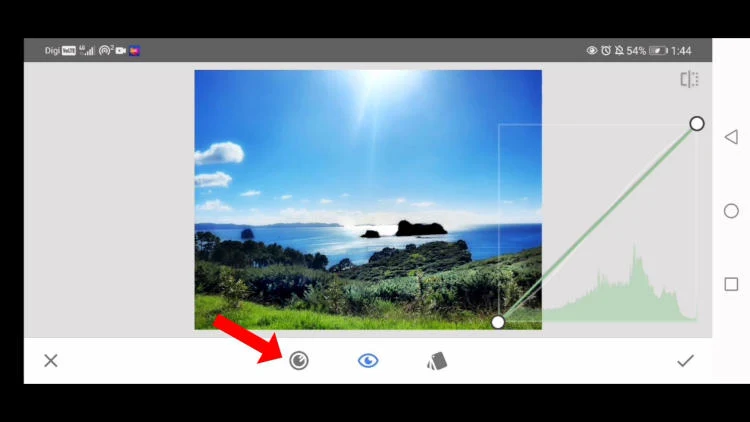
Then select green.
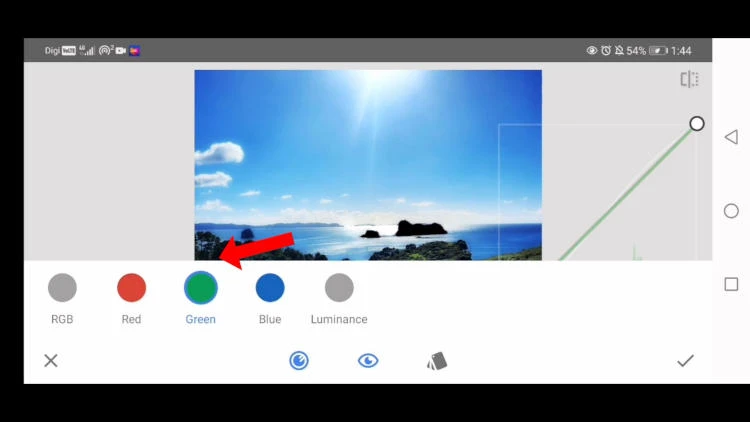
Increase the curvature of the line by moving it towards the top left. This way will increase the intensity of green. Save the setting.
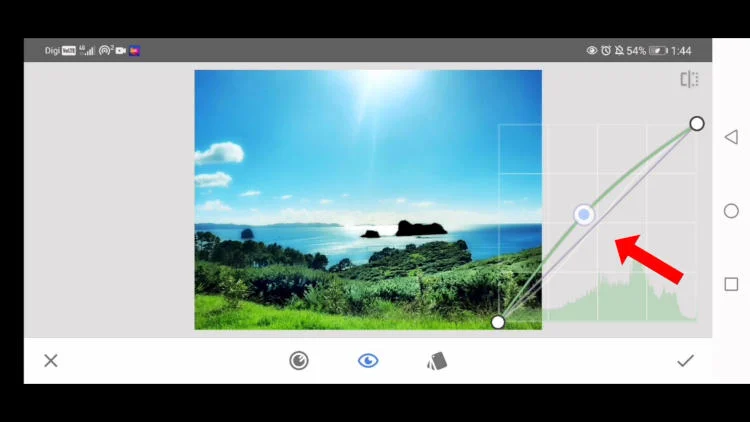
Now go to the Edit Stack, then View Edit just like before. Then select Curves Tool.
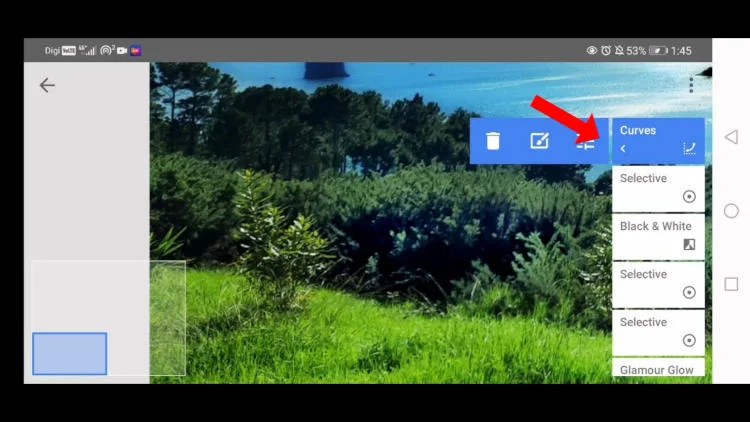
Highlight the grass in the foreground to make it greener.
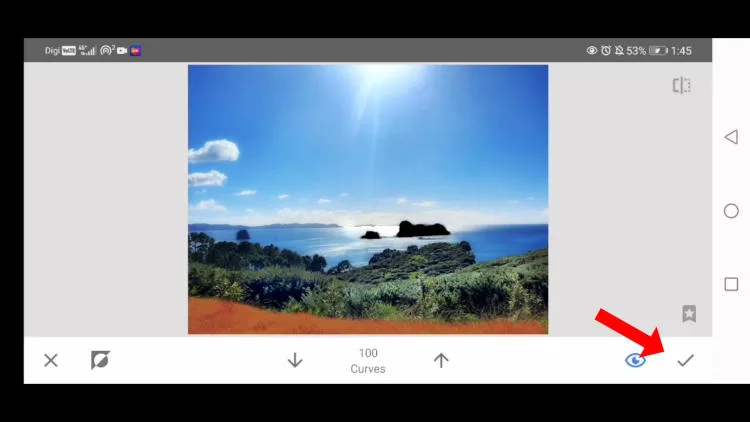
Click the Save button.
Lastly, click the word Done to save the image.
A quick comparison -before and after
Here is the comparison of before and after images.
Let's take a look at the final result. The sun is glowing, the water is shining, the foreground is brightening up, and the grass is greener now.
Please click the before and after image below to watch the video version of this tutorial.
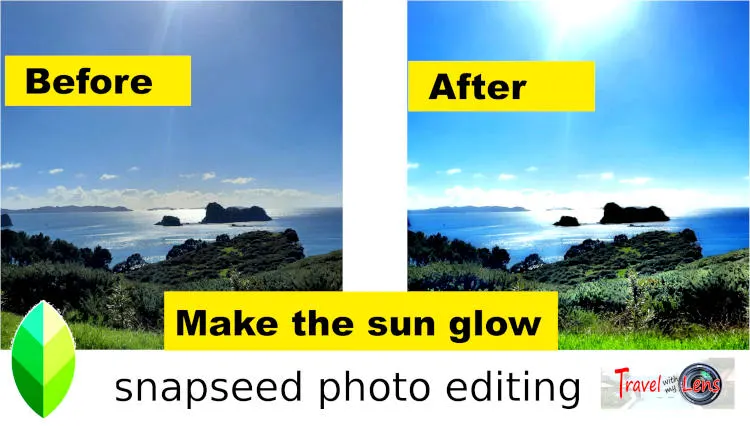
That's how to use the Selective Tool and Glamour Tool. These are my favorite tools for landscape for sunray and reflection.
Links to other tutorial in Snapseed fundametal
This image will look even better if you combine it with other tools.
- You can watch other videos on using Snapseed by getting back to the main page of Snapseed Fundamental.
- Alternatively, click the link below to access to other step-by-step tutorials:
- Tutorial 1: Tune tool - how to use it for the best result
- Tutorial 2: How to edit selected areas effectively with masking tool
- Tutorial 3: Glamour glow - a useful tool to improve light reflection
- Tutorial 4: How to edit food photos with stunning result fit for Instagram
- Tutorial 5: How to remove object of a photo (quick and easy)
